Inspiration can strike at any moment.
Seriously at any moment.
Like the time I had a vision that a mosaic counter made out of broken bits of china.
This is DIY repurposing at it’s best!
Oh yeah, I totally did that.
And I didn’t ask my husband either.
It was many years ago when my daughter was small.
I think she was taking a nap, and I thought….what would it look like if I took some of my not so nice china, smashed it and turned it into a mosaic china tile counter.
Brilliant, let’s do it!
I think I may have been watching too many episodes of Trading Spaces.
Do you remember that show?
So I took out my hammer and got started on some of the prettiest pieces of china that I had.
Sat outside on our patio and smashed away!
My neighbors probably thought I lost my mind!
I had no idea of what I was doing, the idea came to my mind and I just went for it.
I do that a lot 😉
Then I realized I needed some sort of adhesive to put on my counter for these pieces of china to adhere.
As I said I did not know what I was doing.
This was before blogs, and the internet was not what it is now.
The next day I ran out and bought adhesive of some sort, and grout.
And I started adding my broken pieces of china to my counters.
Did I sand my counters first?
Nope, I just started laying those broken pieces of china on my counter with my adhesive.
I was so proud when I finished all of the 300 sqft or whatever size it was.
After the adhesive dried, or I thought it had dried, it was time to add the grout.
I mixed it up, and slapped it on my broken pieces of china.
After I finished I stood back and looked at my work.
Wow…it looks…..different.
No, it looks amazing…yeah, I really like it!
My husband came home…..so how do you clean it.
Oh, well I didn’t really think about that.
You see the thing about using broken china on a counter, not all of it was completely flat.
If you ran your fingers on my counter, you would have cut your hand.
Hmmm, guess I didn’t think about that.
In a panic I started taking all of this off of my counter, frantically as fast as I could before it really set in.
I must not have done this completely right because, this mosaic counter came off really easily.
So all that time I was smashing my china, and creating it ended up in the trash.
The amazing part is that my counters looked like nothing ever happend!
Thank goodness I never sanded first!
Missing that step may have saved my counters.
This happened many years ago in our past home.
So now you know how my mind works.
And how at any moment inspiration can strike.
Several years ago I found an old metal hardware box.
I really have no idea what this was used for originally, maybe screws and things?
But I thought it was cute and used it for quite some time on my desk for …..desk stuff.
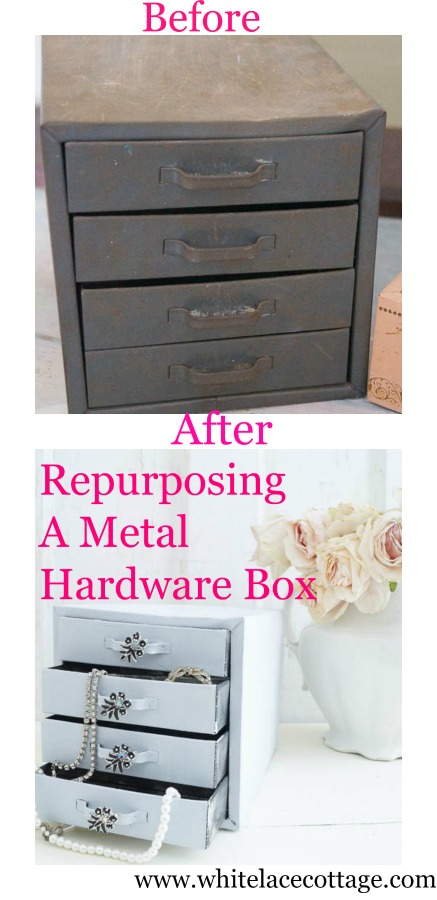

Anyway, I was looking at it next to my jewelry and thought, I think I will try repurposing this metal hardware box into a little blinged up jewelry drawer.
So I did!
I took out my Heirloom Traditions paint in Twilight.
It’s sort of a blueish gray, but it looks more blue to me.
I know you are probably thinking…you are painting again?
Yes, and I will be sharing more painting projects, since I am getting ready for my Vintage Sale in the spring.
And I am also an affiliate of Heirloom traditions paint.
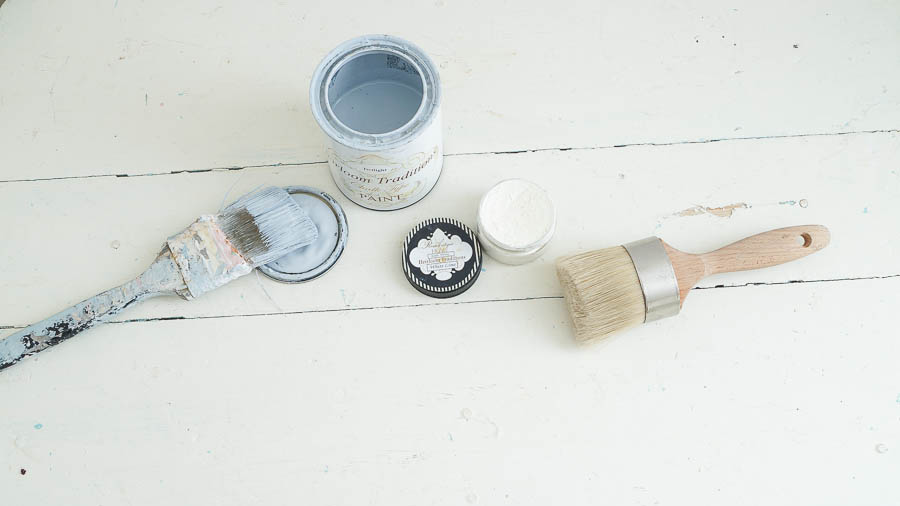
I applied two coats of paint on this little metal drawer.
The great thing that I have found about chalk type paint is that it seems to adhere really well to metal and does not appear to rust.
What I mean is that, if I just pulled out a can of latex paint and painted a piece of metal I would normally see rusty spots develop as I am painting.
Unless I used a primer first.
I haven’t noticed this happen when I use chalk type paint.
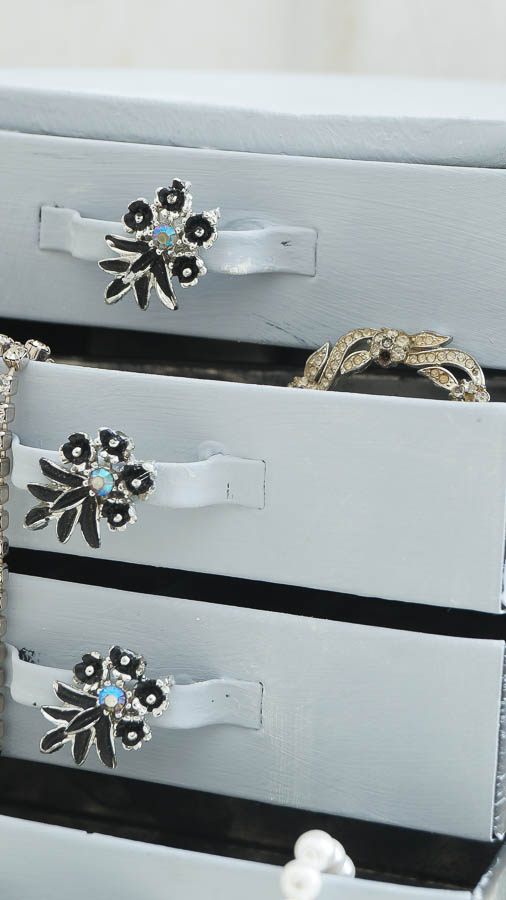
After a few coats of paint I added just a touch of white lime tinted wax from Heirloom traditions.
The reason I added the tinted wax is because I wanted to highlight some of the imperfections on this piece.
Then I added a little bling by gluing parts from an old bracelet to the drawers.
To glue these I used E6000, it’s very strong glue.
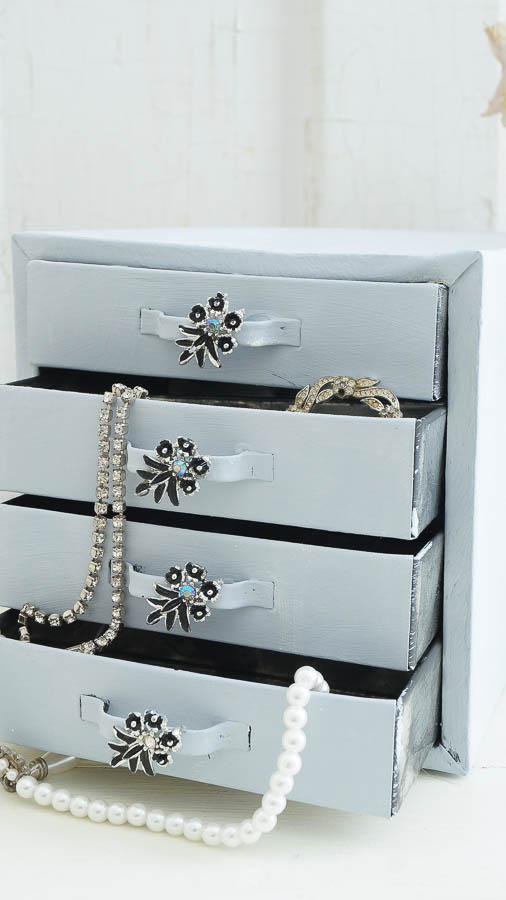
This has a fun Shabby industrial look to it.
I know this is not a crazy idea like my counter idea was.
But I am not afraid of failure or to try new techniques.
Yeah sometimes my ideas are a total fail.
And sometimes they are the best ideas ever!
Well, at least they are to me.
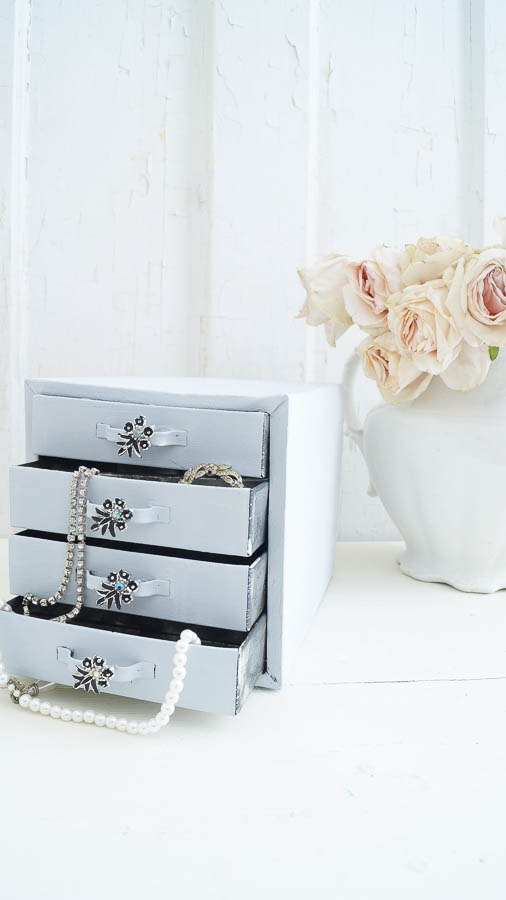
I will be adding to the shop along with a few more treasures in a few days.
Next time you are out treasure hunting look for unique pieces that you can repurpose an transform into a one of a kind jewelry box.
And don’t be afraid to fail.

Hey! I have a piece in the same pattern as your first photo. Got it at a flea market. LOVE that pattern.
You’ve really got some cool things here – great ideas too.
Happy Friday the 13th!
Isn’t that a pretty one Anne. Yes happy Friday the 13th.Other than my migraine headache…it’s been a pretty good day 🙂
You are so funny!
Philippa good thing I did this before the days of blogging and digital camera’s. I look back and wonder….what was I thinking?
I get those crazy ideas too and it is awesome when they work! Sometimes I’m kind of surprised that they do!! Love this repurposed piece!
Ha..I know right….it’s pretty exciting when one of my crazy ideas work Laura, and when it doesn’t then I just learn from it.
Very Cool & nice! Congratulations on your creative good work.
Thanks Janet!
Love the jewelry box!
Thank you Ellie!