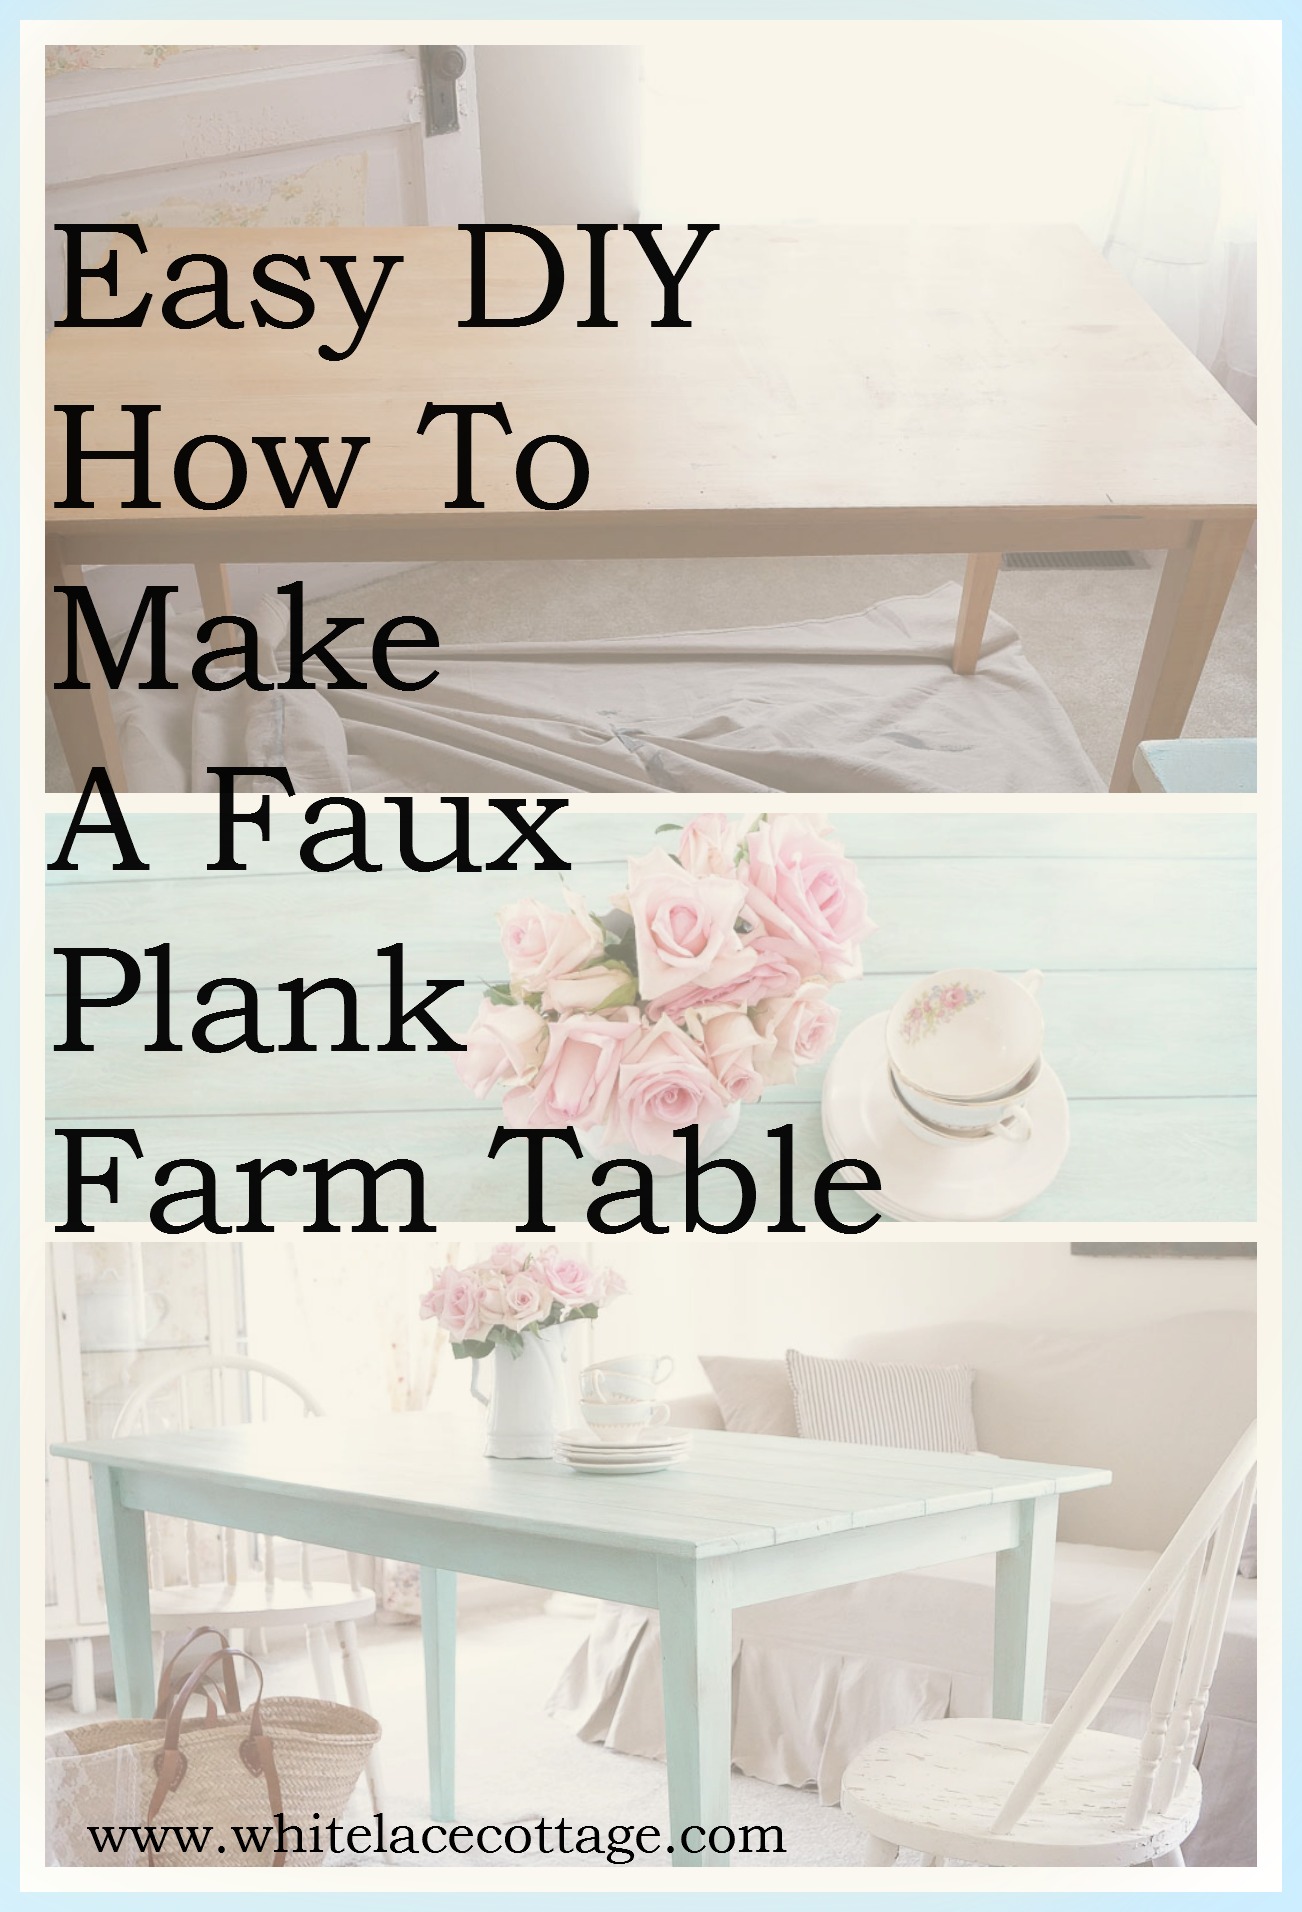
Rustic Farm Table Using Faux Planks
I have to say, this rustic farm table that I created is one of my favorite projects so far! When I spotted it at a thrift store I knew exactly what I wanted to do with it. Yeah, I spotted this table at a thrift store, can you believe it? Of course you can, that’s where I purchase most of my cool treasures. Although, it wasn’t really cool when I found it, but as I said, I had big plans for this table! Let’s look at the ugly table one more time.
(This post contains affiliate links, please see disclosure policy)
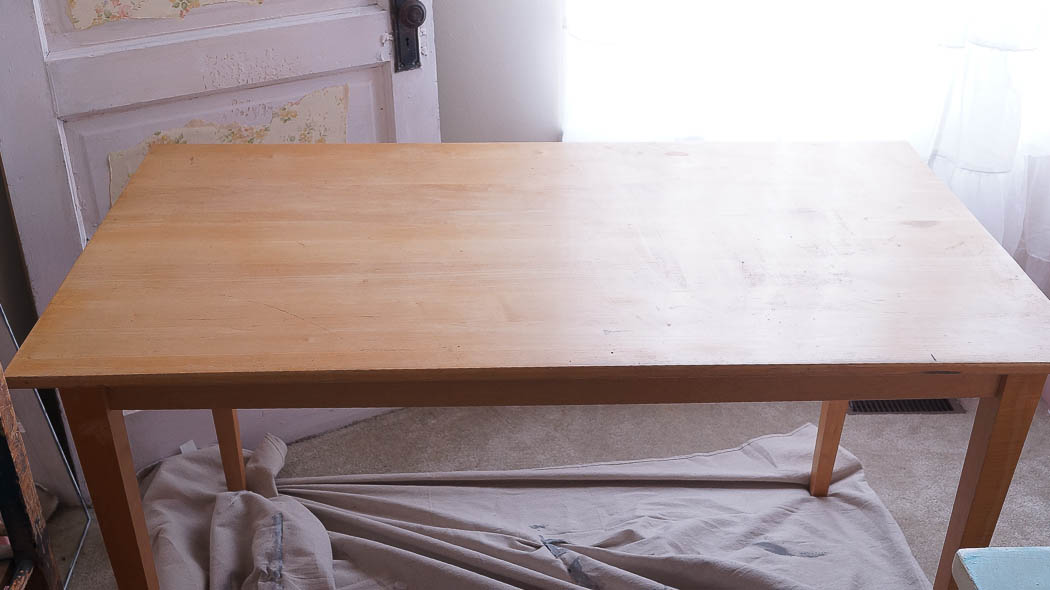
You can’t see it in the photos but, this table was blah and pretty beat up, but it’s still very sturdy. I could’ve painted this table, and added dark wax giving it a little aged patina, but this table needed more than a coat of paint and wax.
And since it’s not old and I’m all about old and rustic pieces, I couldn’t distress this piece because you’d see the newer wood underneath and that wouldn’t be cool. So, I decided to turn this thrift shop table into a rustic farm table with a faux plank top.
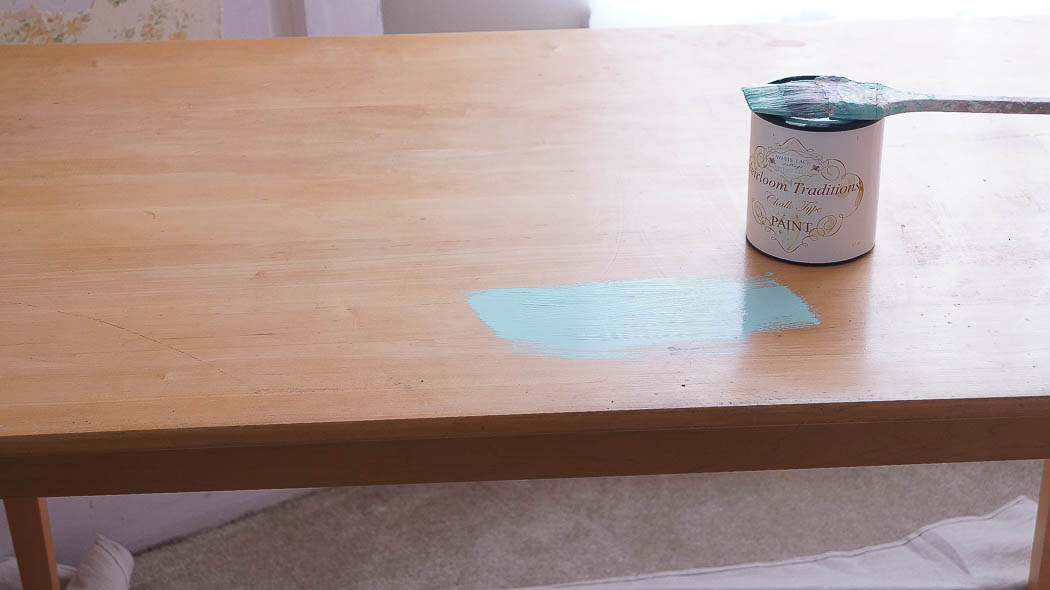
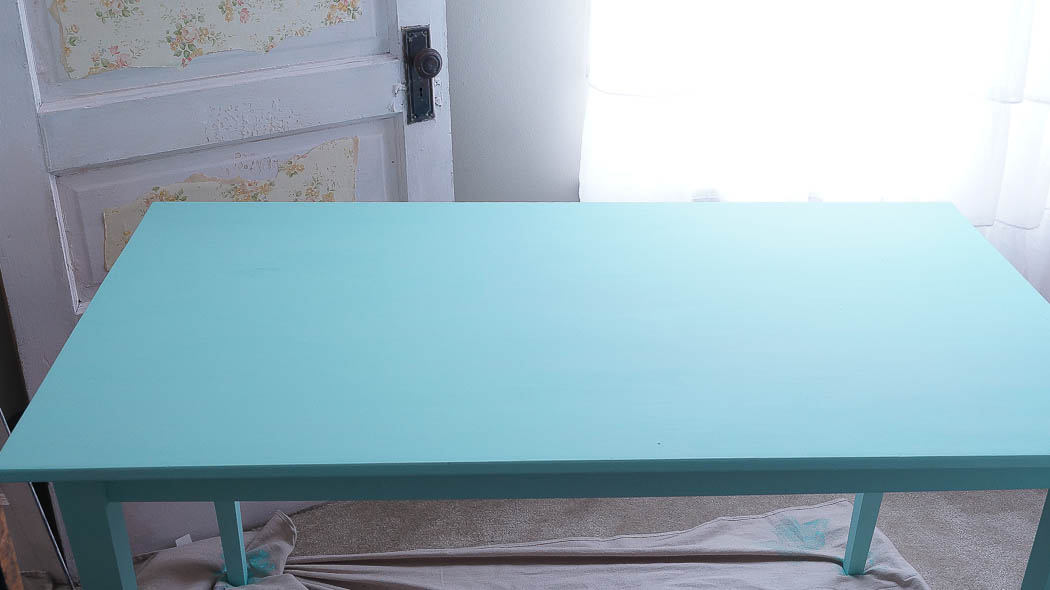
The first thing I needed to do is give it two coats of Vintage Green.
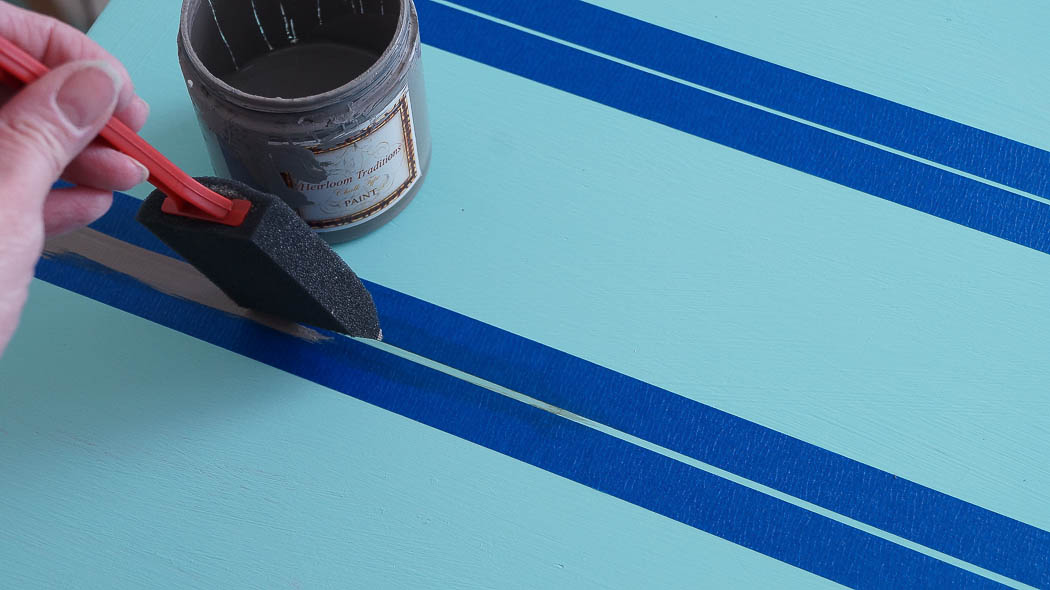
After the paint completely dried, I measured the width of the table, which is 30 inches. I then measured 5 inch faux planks, and added a mark so I knew where to add my painters tape. I really wanted this table to look like a real rustic farm table.
Then on each side of that mark I applied my 3 m blue painters tape and got the line as straight as possible.
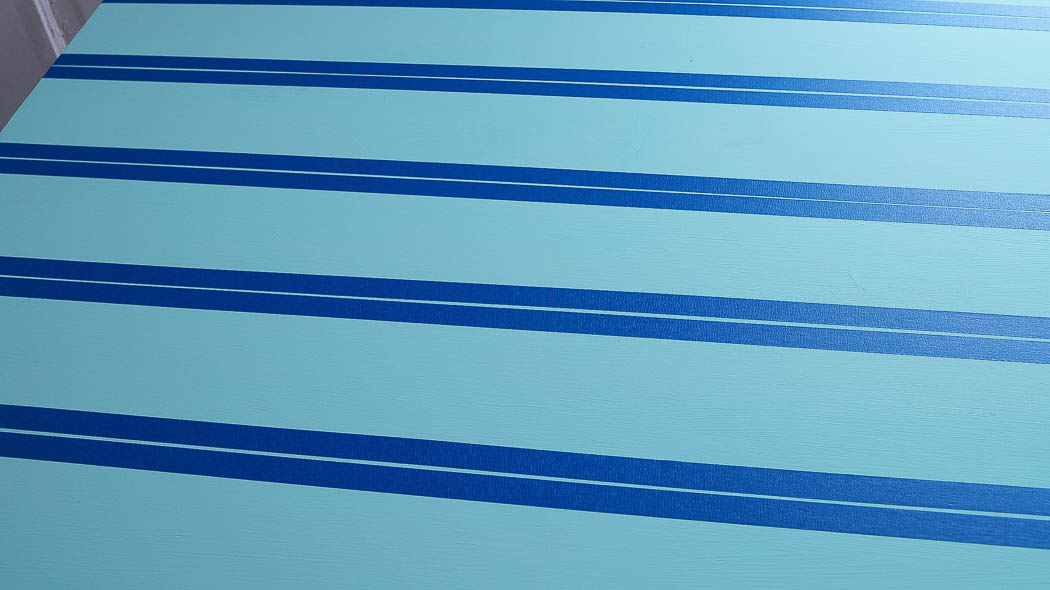
Next, I took out Thunderous, which is a grey brown paint color from Heirloom Traditions paint. Using a foam brush, I carefully painted the lines in between each faux plank, which will give this rustic farm table an authentic look.
I let this dry, then carefully pulled off the tape. Next was the scary part, well sort of, I’ve never used a wood grain tool, and I had no idea what I was doing, but I just went for it! I didn’t photograph this because it was hard to photograph, but you can see a demo in my video at the end of this post.
Using a mixture of Vintage Green and White Lace, I applied this to my wood grain tool and in a rocking motion started applying the paint.
This wasn’t working…hmm.
Okay, so next I decided to paint this on my faux planks, then using the wood grain tool in a rocking motion back and fourth while moving the tool down the table , I applied a faux wood grain to my rustic farm table. And guess what, this time it worked!
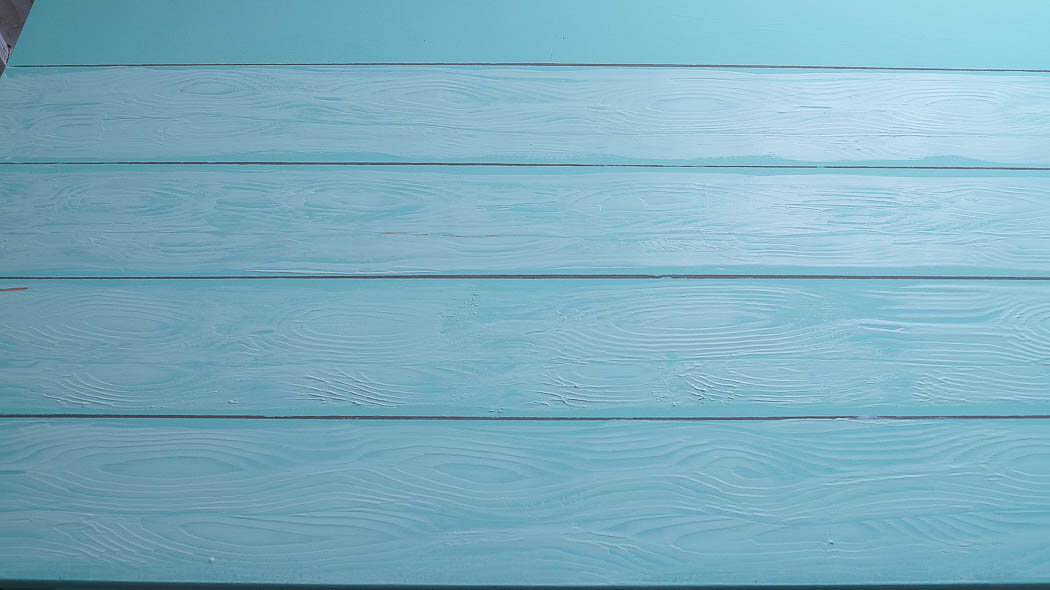
I continued doing the same thing, but on each faux plank, it wasn’t even at all, but you know what? I just went with it, not worrying if it was going to be perfect, because nothing is perfect. And there are no mistakes when creating an aged patina.
Repeat after me….there are no mistakes when creating an aged patina.
Once I was finished I was left with this cool textured wood grain on my table. I was really liking it at this point, but it didn’t look old and that’s what I wanted. The look I was going for was a rustic farm table, and this wasn’t looking rustic at all.
Then, I decided to add a dark wax called Muddy Pond. I applied Muddy Pond to my table, working on a faux plank at a time, then wiping it off with a white cotton rag. Next, I applied a little clear on top of the Muddy Pond, just to tone it down again, then wiping off the excess with another white cotton rag.
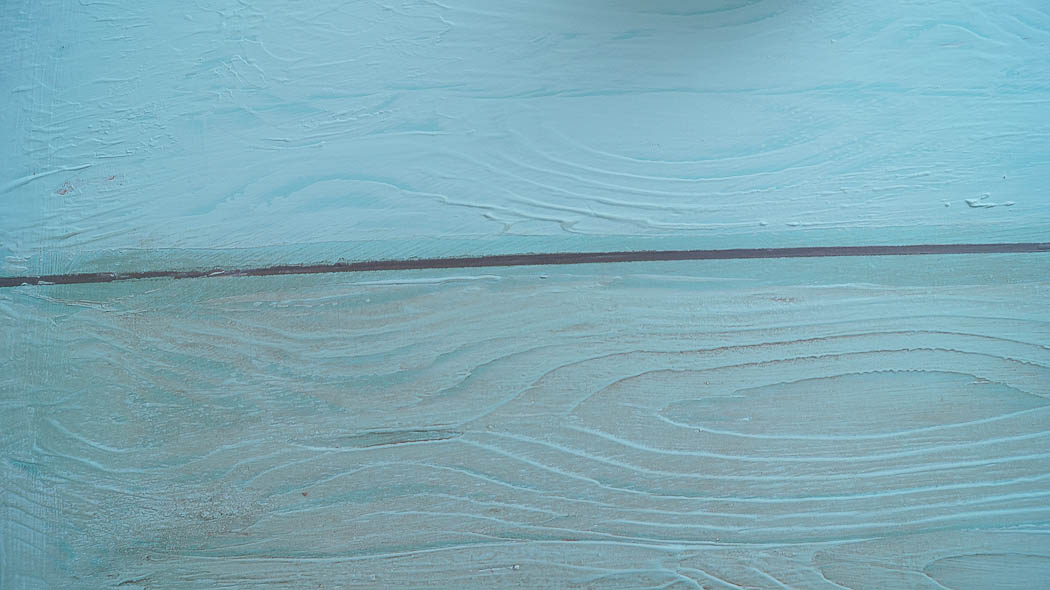
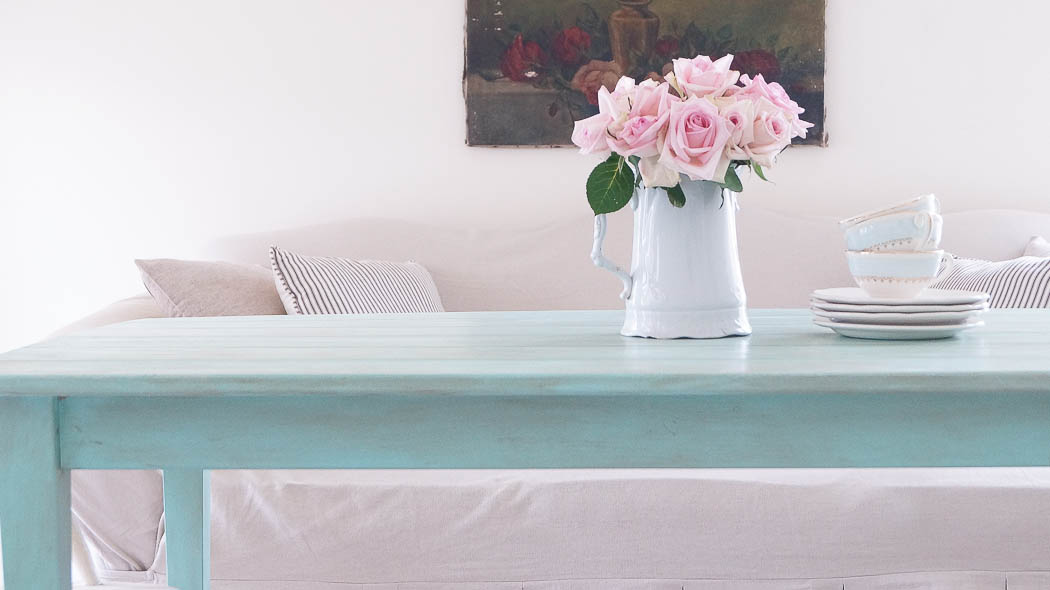
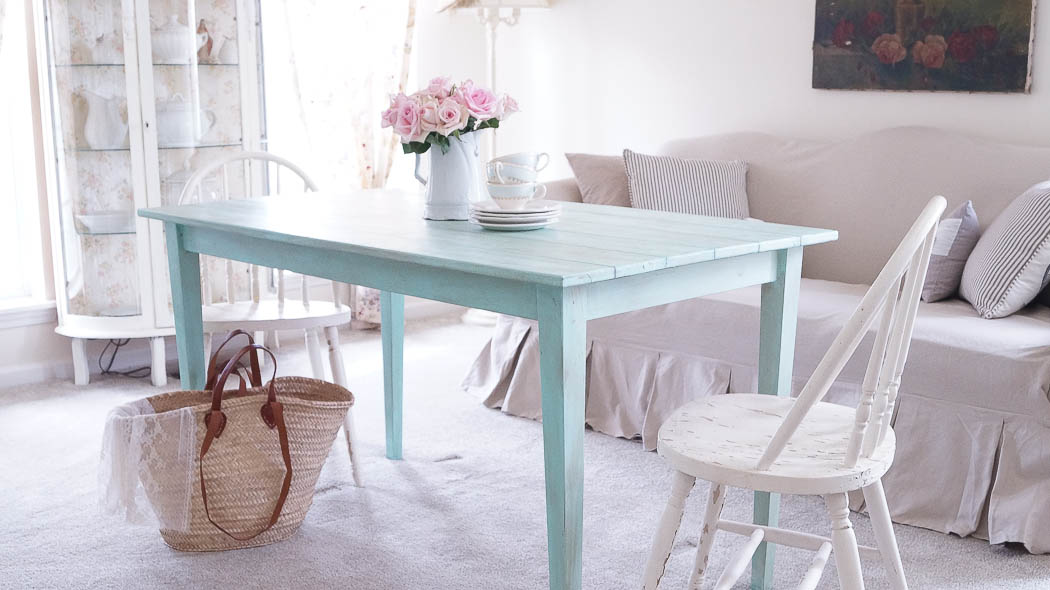
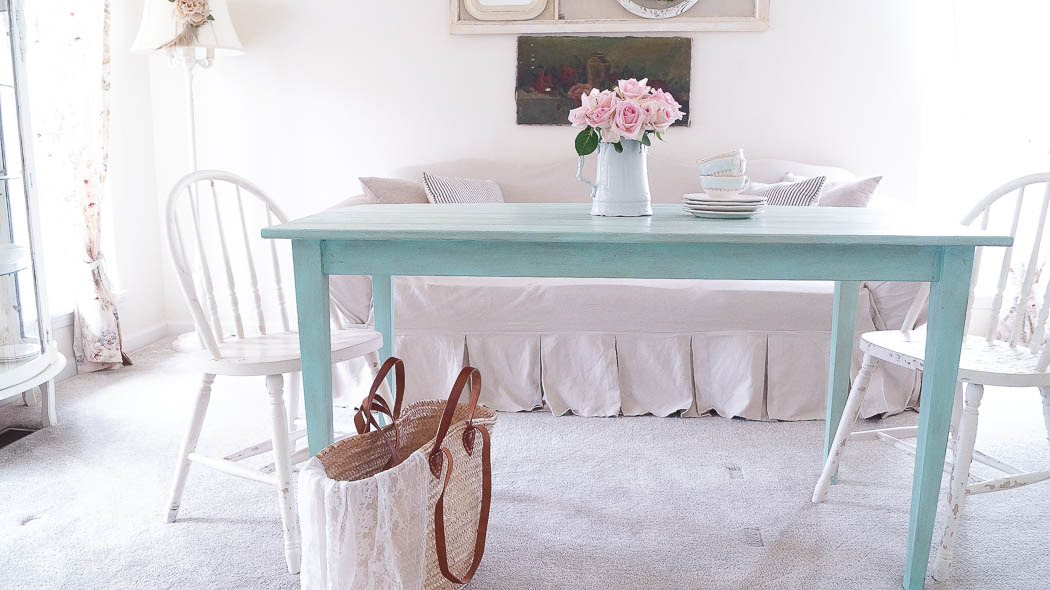
Remember I can’t distress this rustic faux plank farm table because of the newer wood. Each detail of this rustic faux plank farm table started to pop out as I was applying the waxes. After adding the waxes to the table top I also added it to the sides and legs of my table. And here’s my finished rustic faux plank farm table.
I love this table so much and it will be very hard to part with, but it will be available for purchase at my vintage sale in a few weeks.
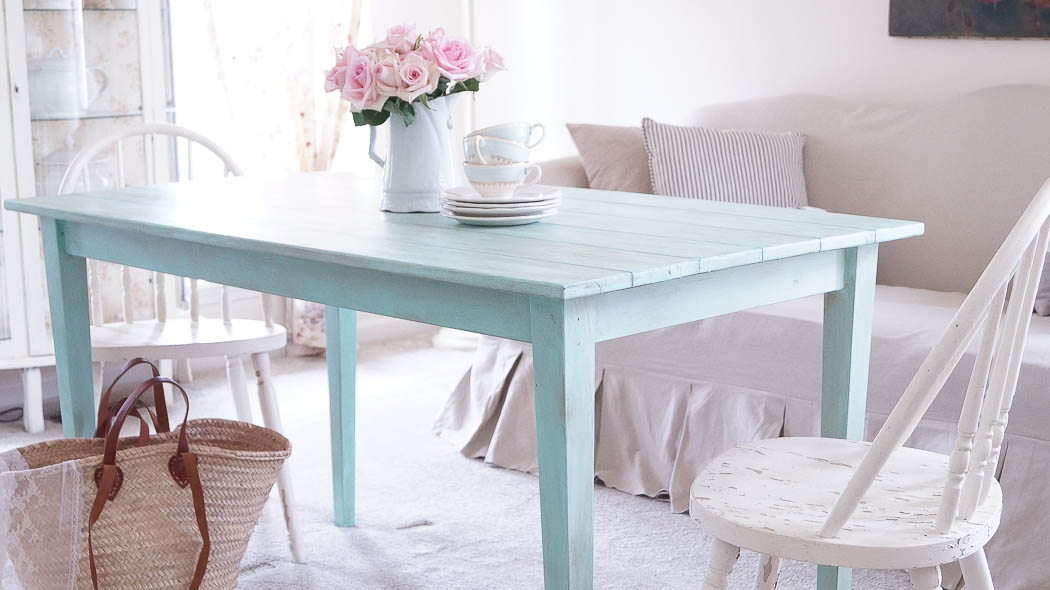
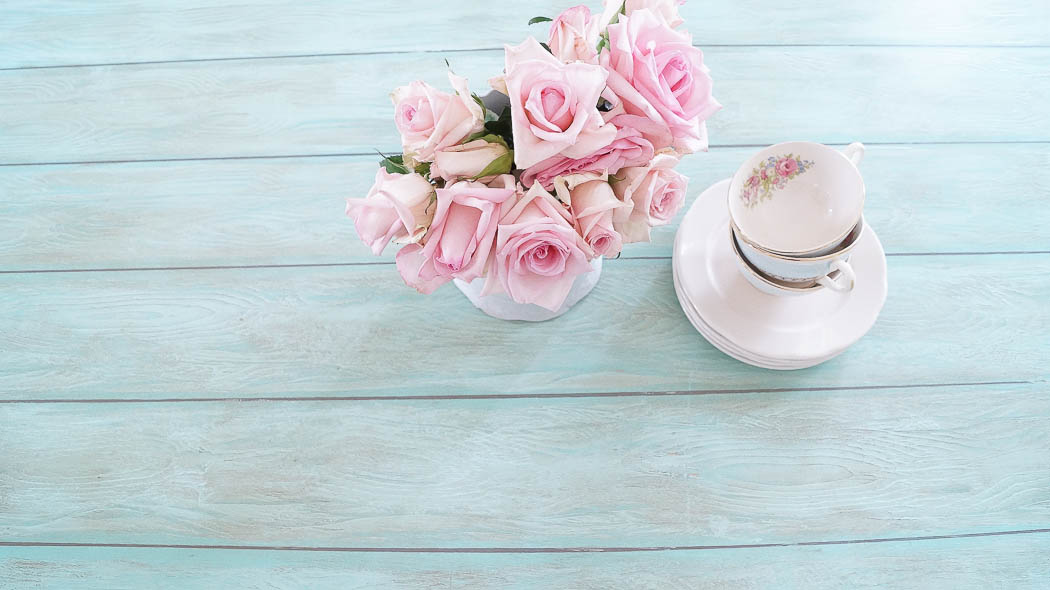
Since I’m selling this table, I had to find a place to take photos and so I decided to prop it up in my living room. I know it looks a little silly, but I wanted to try and get great shots of this beautiful rustic faux plank farm table.
I love how perfectly imperfect this piece is.
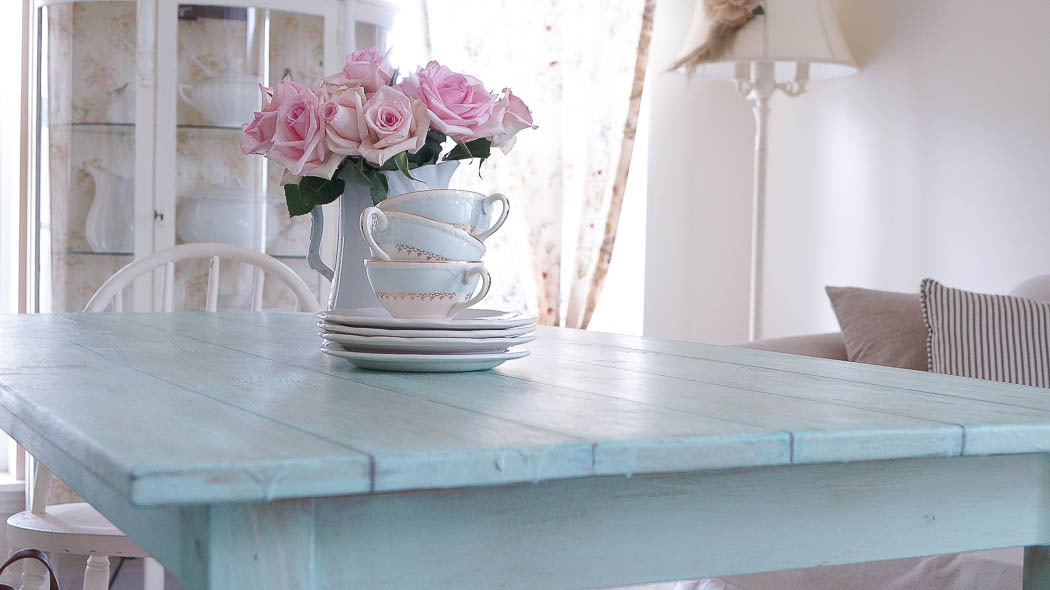
Do you see those paint drips? I could have sanded those paint drips off of this rustic faux plank farm table, but instead I decided to embrace it and leave it. If you look at old pieces of furniture, you’ll see those paint drips, I really wanted to created as authentic of a piece as possible. The dark wax gave it an aged dirty look.
I made sure to add the faux plank lines off the sides of the table. What makes this look real is the texture I got from using the wood grain tool.
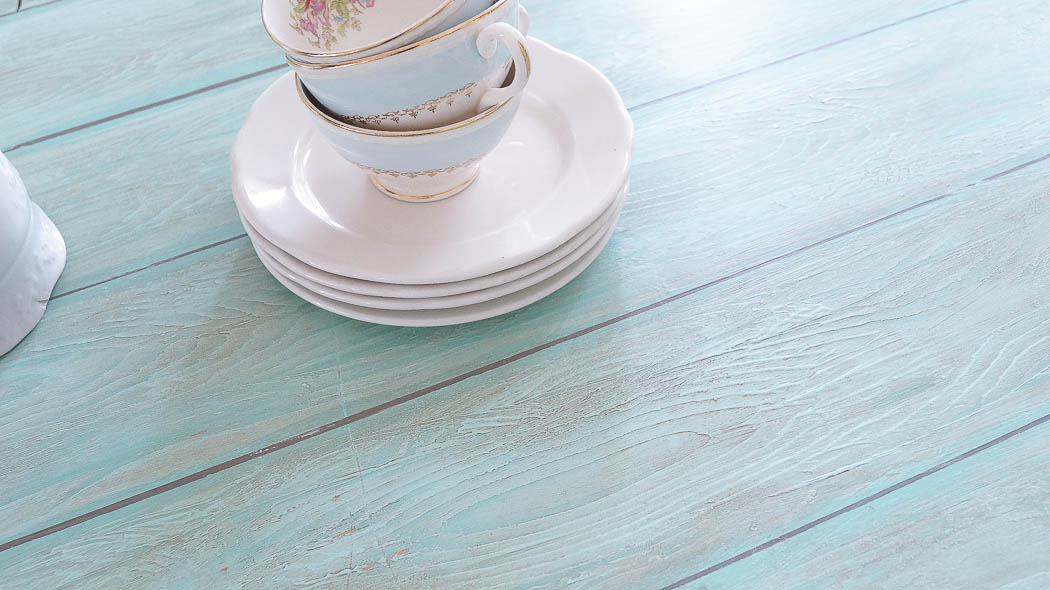
Isn’t that cool! I also love Vintage Green on this table, I think it’s the perfect color!
Have you ever used a wood grain tool for a project? If you haven’t, do you think you would give it a try?
Watch the video tutorial below.
Supplies Used
That looks so cool, Anne! What a great little tool! Love your videos, girl. Always so much fun to watch! 🙂
xoxo laurie
That turned out gorgeous, love the color and those planks look so real. Using the wood grain tool made all the difference. Great job Anne.
Love it! Looks great. I have never used a wood grain tool, but it is now on my list of things to do this summer.
This was a fantastic transformation!!! I happen to have a plain square side table that would look wonderful with this treatment. I also happen to have a wood grain tool, but never used it, but after reading this post- I am definitely going to try it out!
Just looks great and what a great idea. I did see your video but still looks hard to do!
Looks fabulous!
It looks so good! I can’t believe it’s a faux technique.
That is so amazing. I would love to copy this idea sometime.
Love how your rustic farmhouse table turned out. Great job on transforming your new table to old one. Going to remember that so can try it on table out in shed. Would be perfect table to try it on.
Actually that graining tool has been around for some time, still have one tucked away. Guess now I know why I kept it all these years. .Used it on pieces in our house in MT. Wasn’t til we lived in MT I discovered craft shows on HGTV during day. This was good as I was alone alot out there and having craft shows for stimulation and inspiration helped me pass time Hubs was on road for weeks at a time. In winter days and weeks seem to crawl so if wasn’t working somewhere in Helena I was fixing up pieces. At time there were only 4 houses out there, we all had 20 acres.
I started buying old tables and fixing them up to sell after I’d get pieces hubs made fixed up. Then was selling pieces like tables, benches, stools and country signs, little cabinets hubs made at one of antique store, craft shows. At least in summer could sand pieces out in yard. In winter had to do sanding in our pole shed that had no floor and was very cold. I’d put cardboard and old rugs down to sand on. Had to work around Bronco and car in shed. In Winter have to keep engine heater on motors of vehicles, very cold temps below (25 – 40) zero for weeks during day. Before we got our double wide, back door on single wide would freeze closed since it swung out, not in. After San Diego, MT was a learning experience, lol.
Have great week Anne
Hi Anne, I love your tutorial! I can’t believe just how much your table looks like planks. Great job! xx Jo
I can’t believe this is the same table either! You did such a great job, bet it was fun to do. I do love your choice of colours.
What a fabulous job on that table! Simply gorgeous.