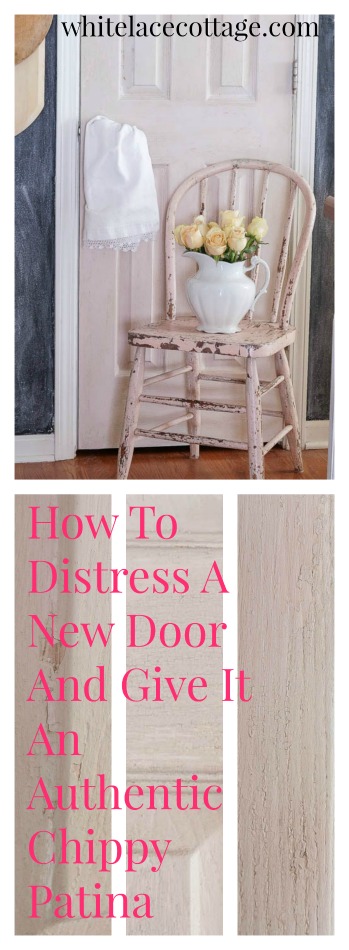
Last week while I was pinning over on pinterest, I found a perfectly shabby chippy door.
This old chippy door was being used as pantry door.
Well, you know me and chippy paint.
At that second , I had a light bulb moment.
(Okay so as much as I would like to share my inspiration photo I can’t.
Did you know that you can be sued using someone’s photo on your site without the original photographer’s permission, even if it’s from pinterest.)
So……where do I begin.
Here is how I stared my DIY chippy patina project.
This was quite a process.
As always I was experimenting and trying to figure out how to make my newer door get that chippy patina that I love, and look authentically old.
My inspiration was my mantle that I created last year.
You can view that HERE.
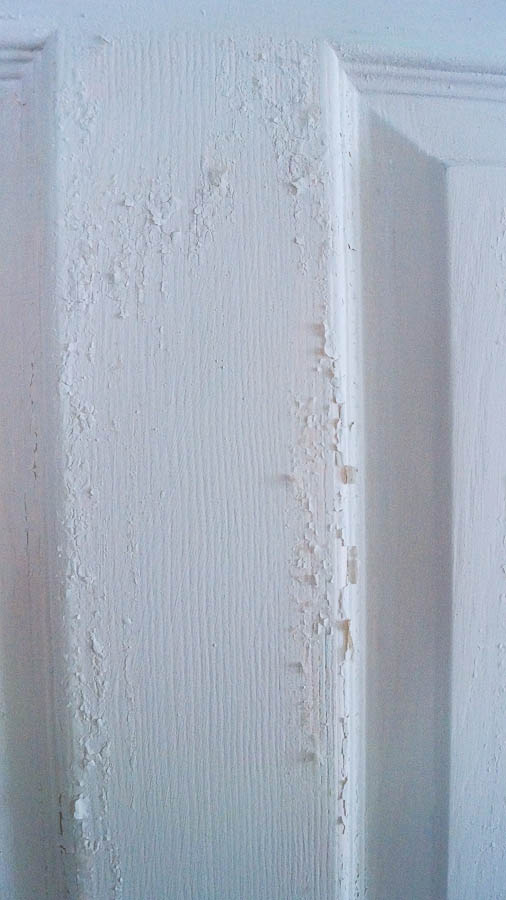
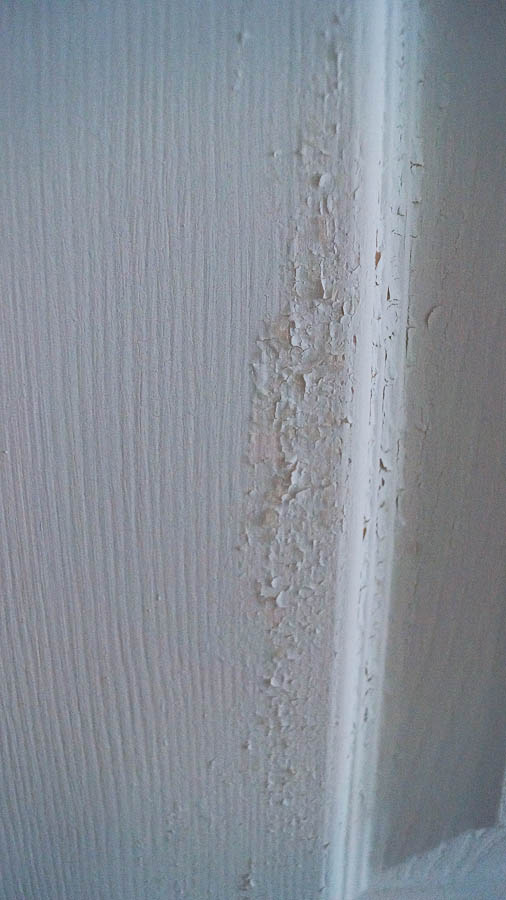
Let’s take a look at my before photo of my door first.
This door is not only white, it’s a faux door.
Yes….that’s right a faux wood door.
I wanted this white door to look old with a cool chippy patina.
As if it’s been painted many times.
Okay where do I begin, this was quite a process.
I will give you the short version, and I will share what didn’t work and what worked.
My idea was to first use milk paint, I used Miss Mustard Seeds milk paint in Grain sack.
Why Grain Sack, because it’s the only color that I had in my stash that was light enough.
I would have preferred white.
Using milk paint could possibly give me a chippy patina.
I say possibly because if you want to achieve a chippy patina with milk paint, it depends on the surface you are painting on.
Usually if you paint on a slick surface with milk paint, you are left with a chippy patina.
Sometimes it chips a lot and other times just a little.
It’s a gamble but that’s why I like working with it.
Well, I took a chance and painted my door with milk paint…..nothing happened.
Okay, well lets try painting it with chalk paint and see if we can distress it.

I pulled out my Heirloom Traditions paint in Buff Rose and started painting.
Then using my vinegar distressing technique I started to distress the door.
Remember this is a faux wood door, sanding was not an option.
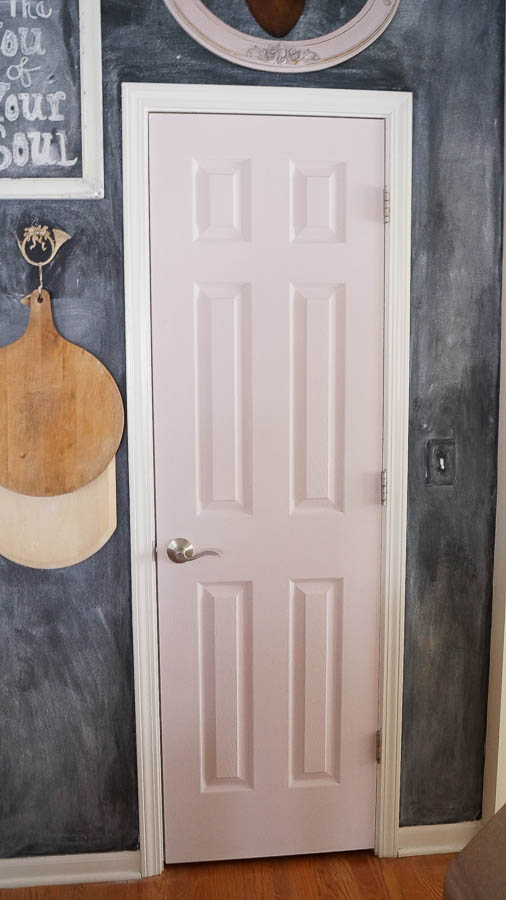
It’s a pretty pink door, but it doesn’t look old
Let’s add a little dark wax and see if that helps.
Well I am seeing details…..maybe.
Nope….nope…nope….not the look I wanted at all.
So, I took my paint brush out again and I painted it another coat of Buff Rose.
Then I waited……
Okay let’s think about this.
I need to create a slick surface so the milk paint does not adhere and chips off.
Ah ha…..
Okay let’s try Shellac.
This stuff is pretty stinky, make sure to have plenty of ventilation.
I opened my patio door since I was in the kitchen.
I brushed it on quickly and it dried in 15 minutes.
Although the directions said 30 minutes.
I am a gambling kind of gal when it comes to painting…I am sure you have noticed 😉
Now let’s try milk paint again.
After applying the milk paint I took out my hairdryer on a low setting and started drying the paint with the dryer.
As I did this I started seeing the paint crackle and chip off.
My experiment was working!
That’s exactly what I wanted to see.
An authentic chippy patina.
After this dried I added yet another coat of milk paint.
Then I used my hair dryer again.
And guess what?
It chipped even more!
I can see some pink peeking through!
Next I took a white plastic spackle tool and started scraping some of the milk paint off.
I didn’t want to scrap it all off, because I was going to add another coat of paint on top.
And those loose pieces of paint were going to be part of the texture.
Next I applied another coat of Buff Rose, this was applied thinly with a little water added to my brush.
I had a container with a little water, I dipped my brush into the water, then the paint.
I could have just added my water to the paint, but I wanted to have control of how watered down the paint was with each stroke of my brush.
After applying this coat I took my dryer out again, and in a sweeping motion started drying the paint.
As I did this I started to see a new texture form, this time with the chalk paint.
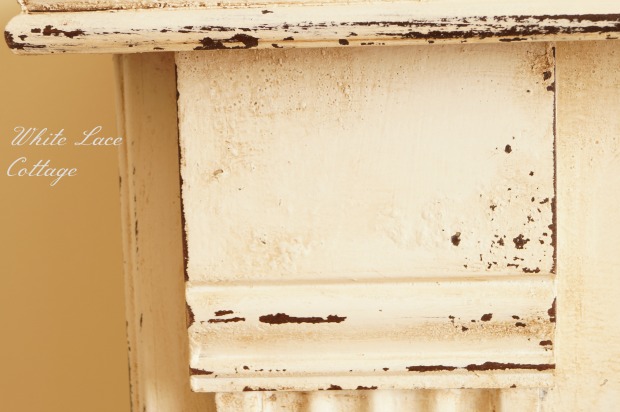
I still wanted to see this crackle and texture a little more, so I decided to add Muddy Pond also from Heirloom traditions.
I didn’t want to alter the color of paint much, but I did want to highlight the texture, crackle and peeling paint on the door.
I mixed the Muddy Pond and Heirloom Traditions Clear wax, adding it sparingly.
I took my time with this process, applied a little, then stepped back to see how this was looking.
Oh, and as I was applying both the clear and dark wax I was using a wax brush.
This really helped get the wax into all those cracks and crazing.
To finish, after the wax was dry, I used my buff brush.
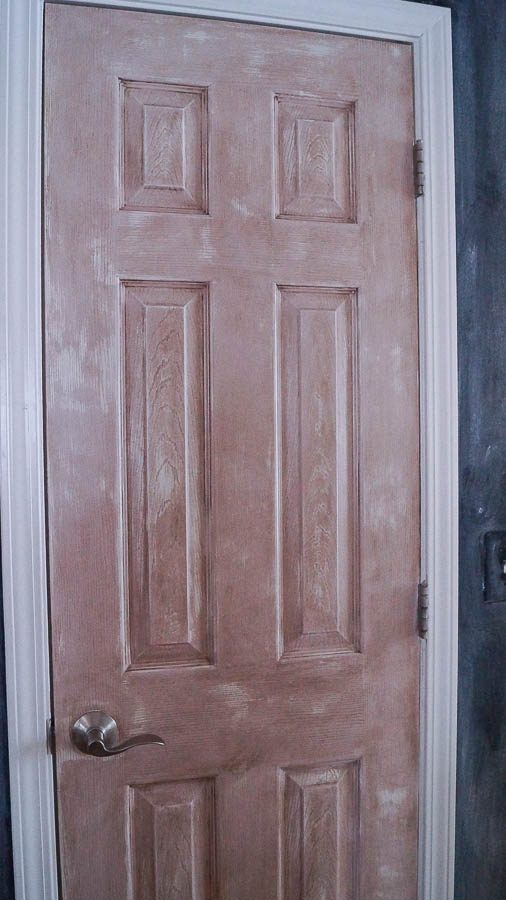
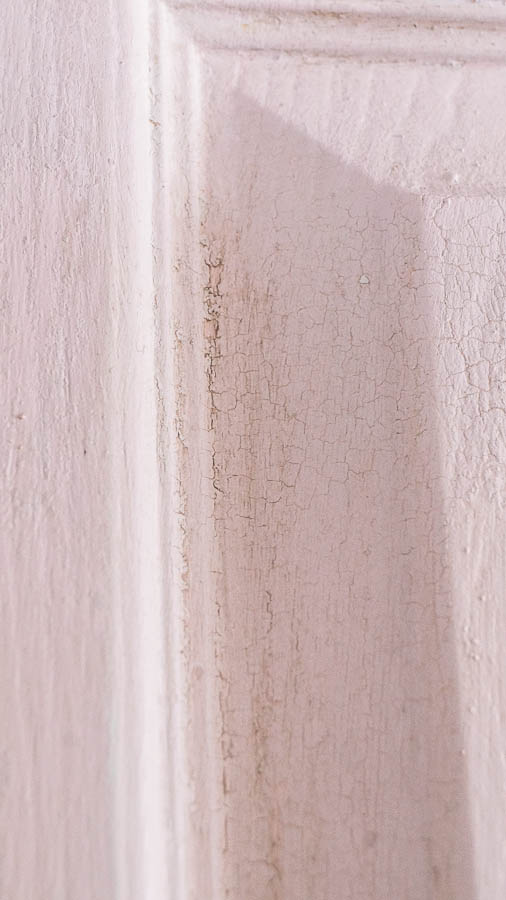
And here it is.
It’s hard to photograph it, from a distance you can’t see all the details, with the light coming through my dining room.
If I had a dark base coat underneath and used this same technique you would be able to see it from a far distance, even in different lighting.
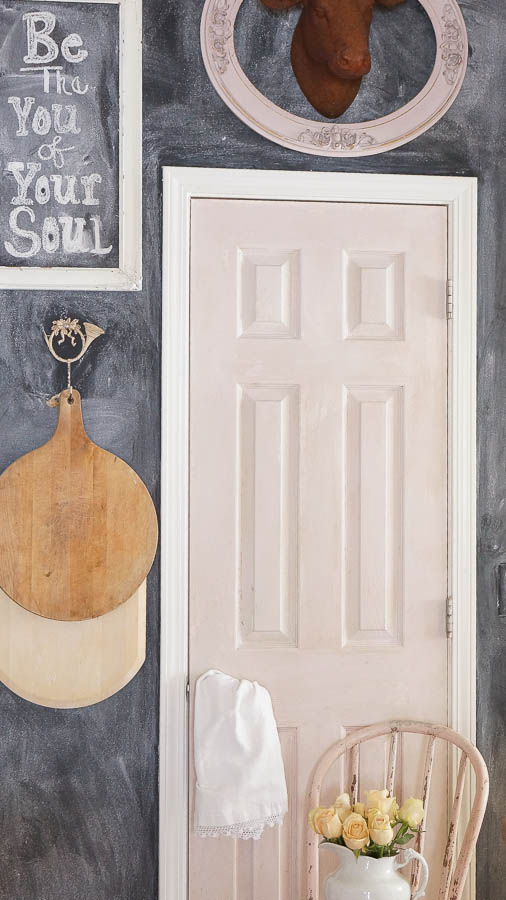
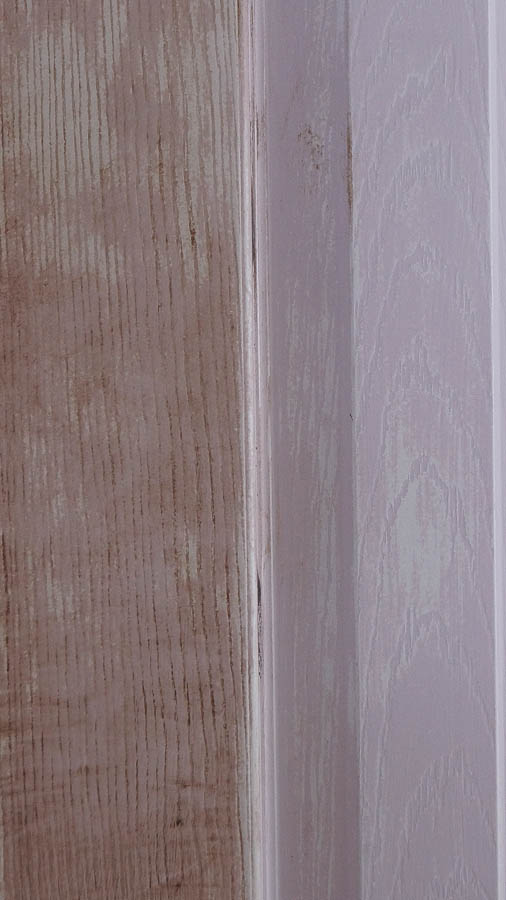
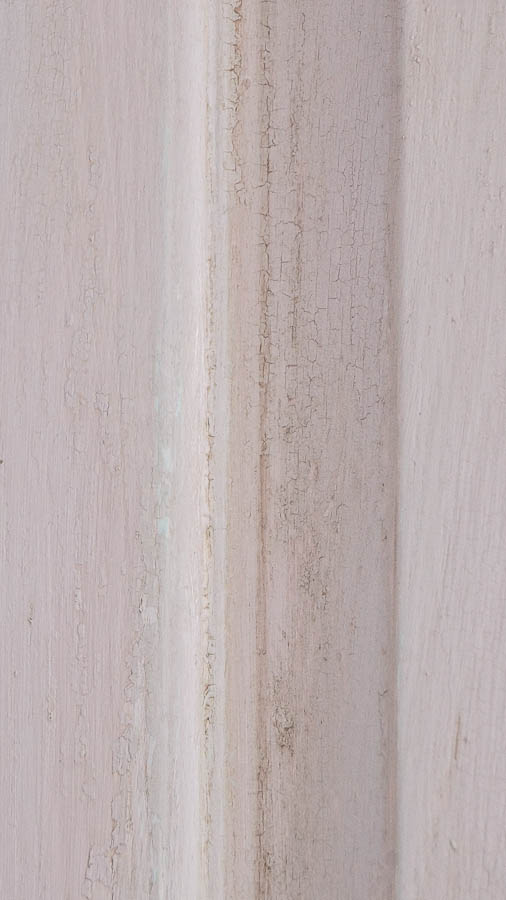
Let’s take a closer look.
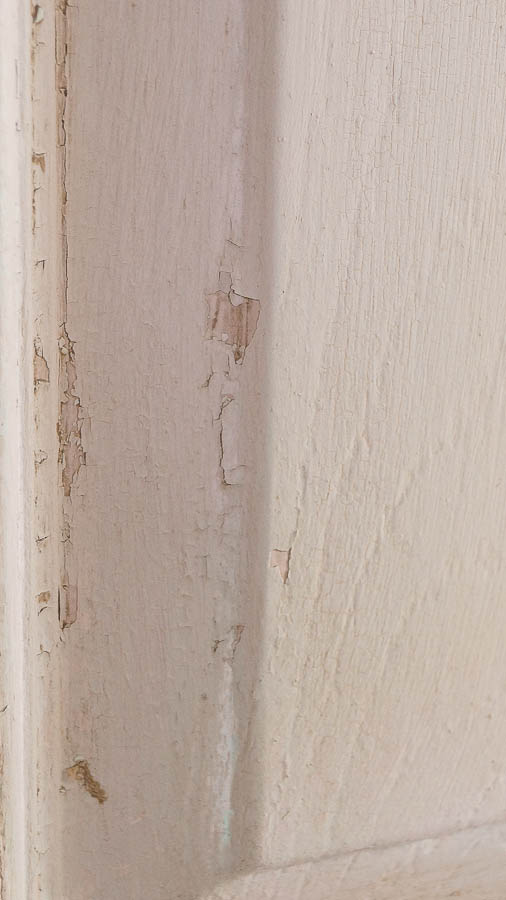
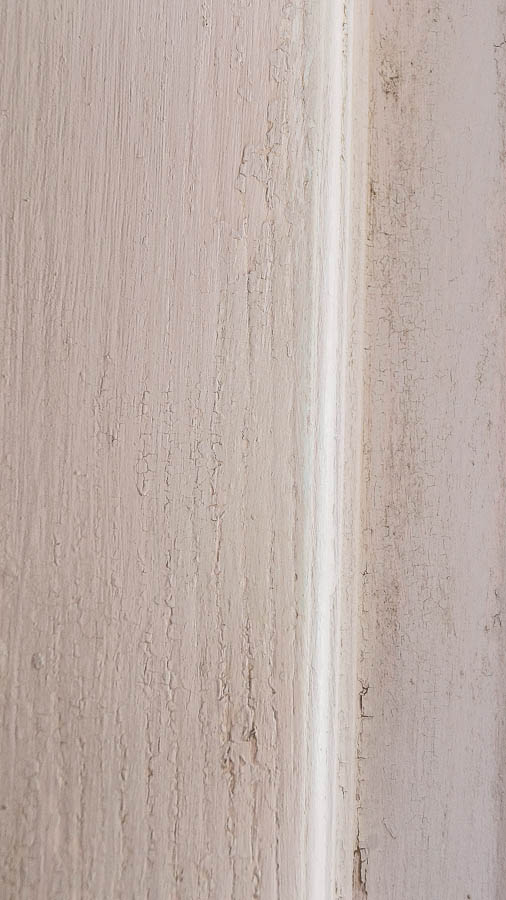
It looks old doesn’t it.
And it has an authentic chippy patina.
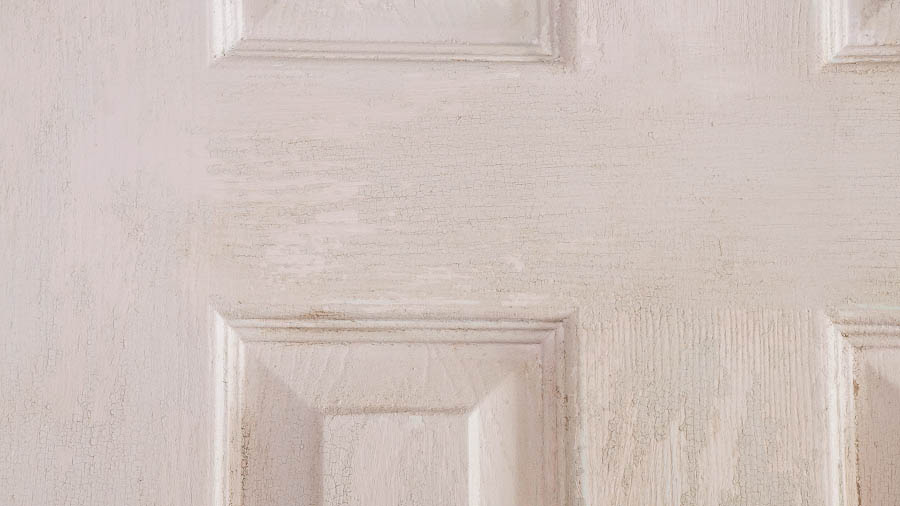
I love all of the layers and chippy patina this door has.
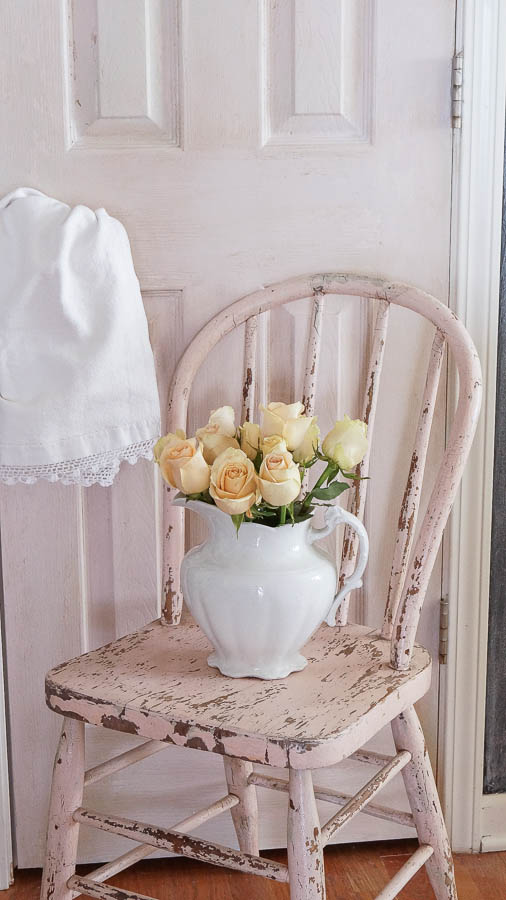
Love this chippy old door, and the color too!
Buff Rose by Heirloom Traditions might be my new favorite color!
Now I know you are probably wondering why I have a towel over my door knob.
It’s because it’s a newer knob.
I am not sure if I can replace this knob with one that looks older.
I know I can’t use an old knob because it won’t fit.
And another question I bet you have.
Why didn’t I just replace my door with an old door.
It’s really hard to find old door that fit in a newer home.
Older doors are a little bigger than the doors I have in my home.
So the next best thing is to make my door look old.
I would love to do this on every door of my home.
But I am not going to.
Since this is not our forever home , I can always replace this one door if I needed too when we sell our home.
Oh, and I did not paint the inside of the door.
This chippy door is just an illusion.
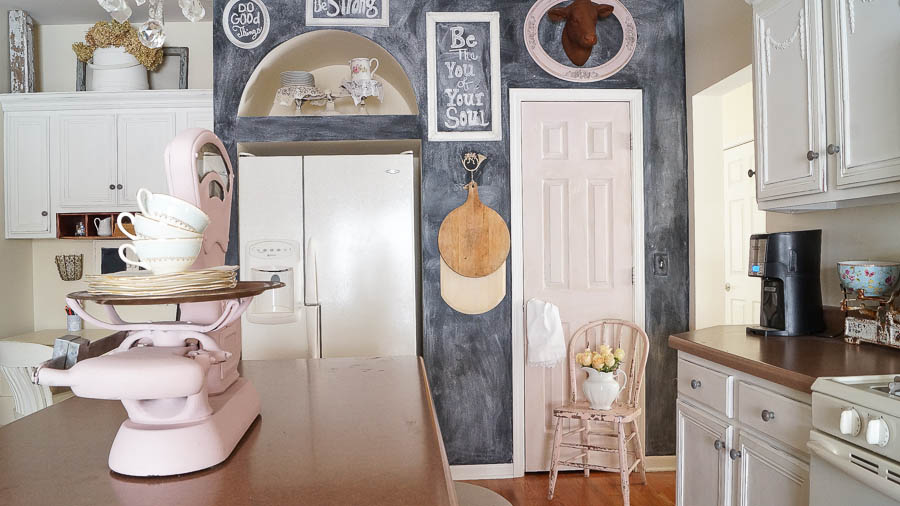
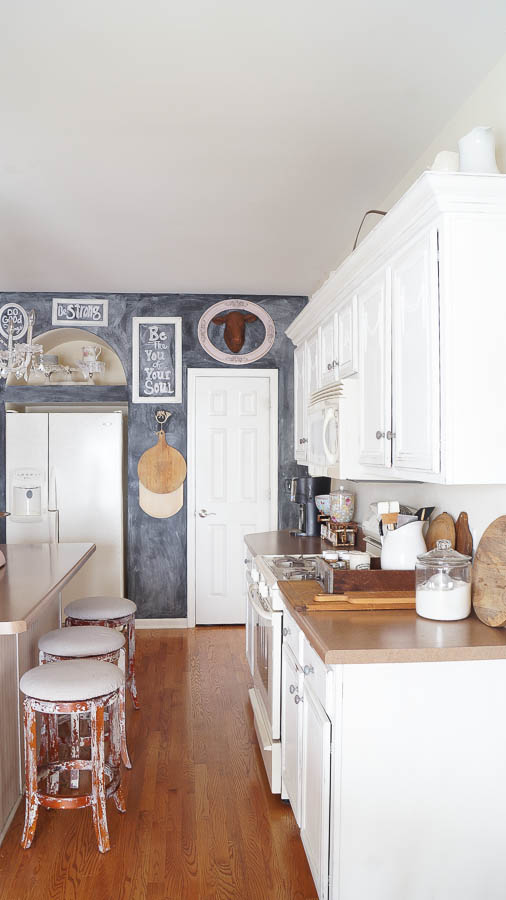
So what was I saying about not adding too much pink into my house?
I have to say I am pretty lucky to have an amazing husband that let’s me create in my house.
“I am an artist and my home is my canvas”
If you would like to create a similar look with a piece of furniture here is my advice.
If the piece has a very slick surface you should be able to paint it using milk paint to get that chippy look.
Then lightly add chalk paint on top.
Why chalk paint?
Because using chalk paint will also give your piece another layer of texture and will help in creating that authentic chippy look.
If you don’t have a slick enough piece think about adding a coat or two of shellac first.
**But make sure to use it in a well ventilated area, and follow the directions.**
Then, paint it with milk paint and chalk paint.
I have painted several pieces using milk paint and chalk paint and I have had wonderful results.
Milk paint and chalk paint really work wonderfully together.
Especially if you want to create a truly authentic chippy piece.
It’s not easy trying to duplicate what happens naturally as paint ages.
But with this technique you can get pretty close to the real thing.

Joining:
I just love your enthusiasm to bring a vintage look to your surroundings. Love your end results as well! Thank you for sharing. I live in an old farmhouse dating back to 1831. I have been working on wall cupboards the last couple years that were in the first house our 97 year old neighbors first had. Back then when you moved, you took your cupboards with you. 🙂
These were kept in their present day coal cellar, they had been there in a dark dank cellar blackened through the years since 1940. I have scrubbed, sanded the embedded coal dust and aired them outside off and on over a year. They are now hanging in my kitchen. I have had numerous people ask me when I was going to “paint them” so they are all the same color and finish. They are floored when I tell them I have no plan to do that. Two cupboards are pale yellow, bluish, turquoise, original colors, you see all these colors.. While working on them, my thoughts often reflected to Florence, who has since passed away, to her color choices.
Thank you Dee! Oh I would love to live in an old historical home.Yours sounds wonderful! Your cupboards sound amazing! Love that you are preserving them and keeping as is 🙂
I love your chippy door and the technique! There are so many great ways to make new things look old. And, for the record, there’s no such thing as too much pink!
LOL I agree…I love my pink <3 And thank you Kimberly!
Aren’t you the clever one!
Mind you frustration is the mother of invention isn’t it?
Thank you Philippa! I never give up LOL!
Absolutely beautiful. I adore the vintage flair you gave to the door and coordinating chair!
Thank you so much Stephanie!
I love your technique! I am planning on making one of my doors look old, and I was wondering if you sealed the door with anything once you were done? To keep it from chipping more and more. Thanks!