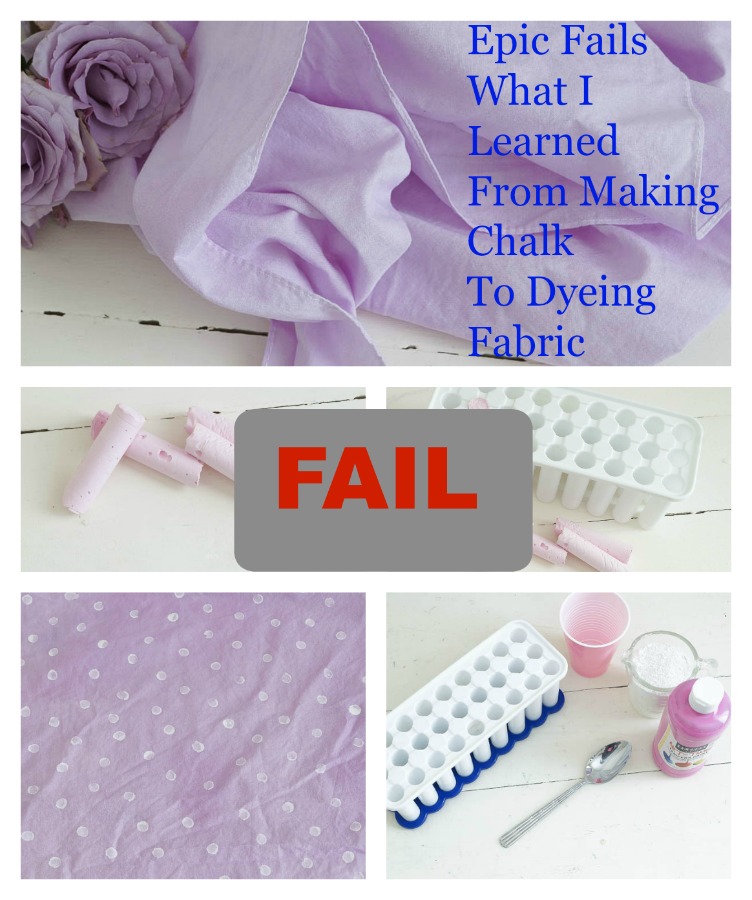
So you think everything I share comes out perfectly.
That can’t be farther from the truth.
When I get an idea in my head I go for it, never knowing what will happen.
Recently I shared my framed chalkboard wall.
Then I had an idea and thought it would be fun to make my own chalk.
What luck I had while I was thrift shopping, to find a mould that would work perfectly for making chalk!
So I went out and purchased Tempera paint, because I was told that you need to use tempura paint if you want color chalk.
It’s not supposed to stain or leave a marks on your wall if you use tempura paint.
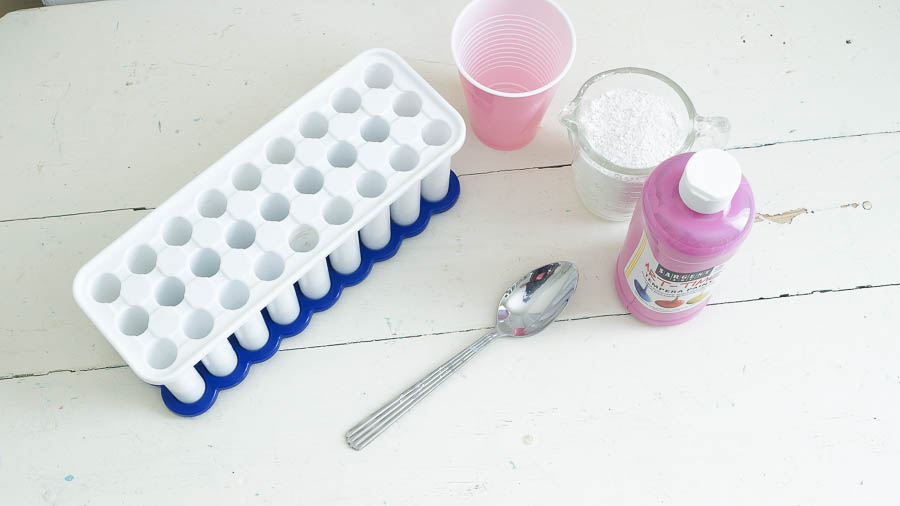
I had all of my ingredients.
– 1 cup of Plaster of Paris
– 1/2 cup of water
– 1 tablespoon of Tempura paint
– Plastic cup
– Spoon (not one that you eat with 🙂 )
– Mould
I wasn’t sure if I should add anything to my moulds to prevent the chalk from sticking.
Then I thought…..well it might be okay since it’s plastic.
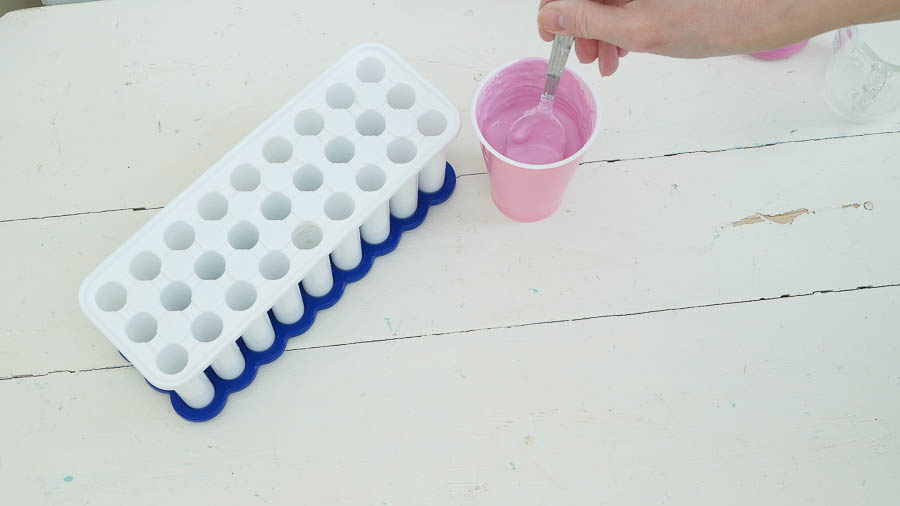
So I added my tempura paint to my water, then slowly started adding my plaster of Paris.
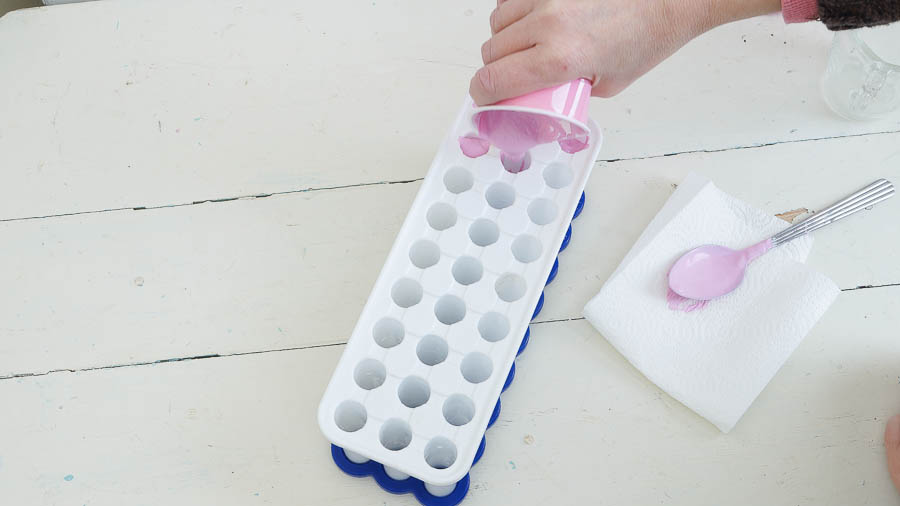
I mixed this all up well with my spoon and was ready to start filling my moulds.
So far so good!
After I filled up my moulds I let this sit for 24 hours.
The next day I was excited with anticipation as to how this turned out.
Hey I have chalk!
Looks great right?
Hmmm…..well not exactly let’s take another look.
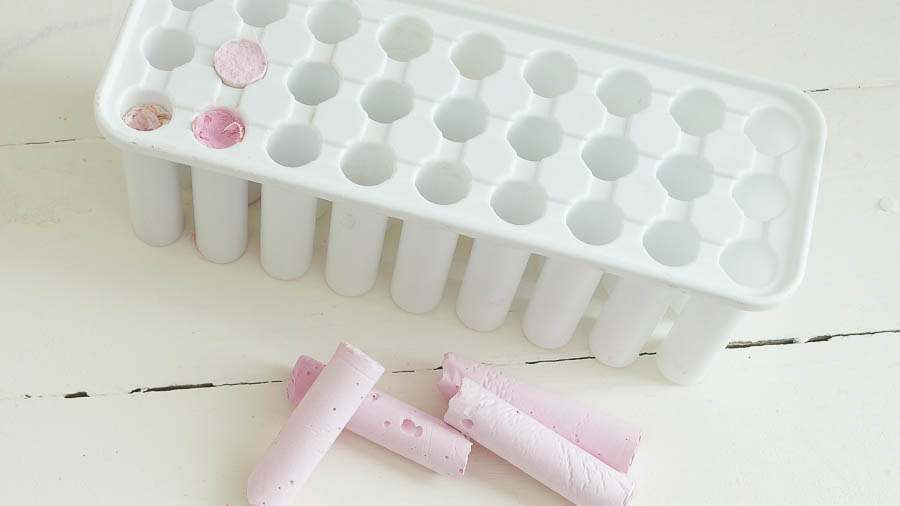
After I tried this the first time, yes this was my second attempt.
The chalk was stuck inside, I could not get it out of this mould.
I had to hold the mould under hot water, lots of tapping and banging and well, you get the idea.
It did not go well!
Okay, so how about adding wax paper inside the mould then adding my chalk mixture.
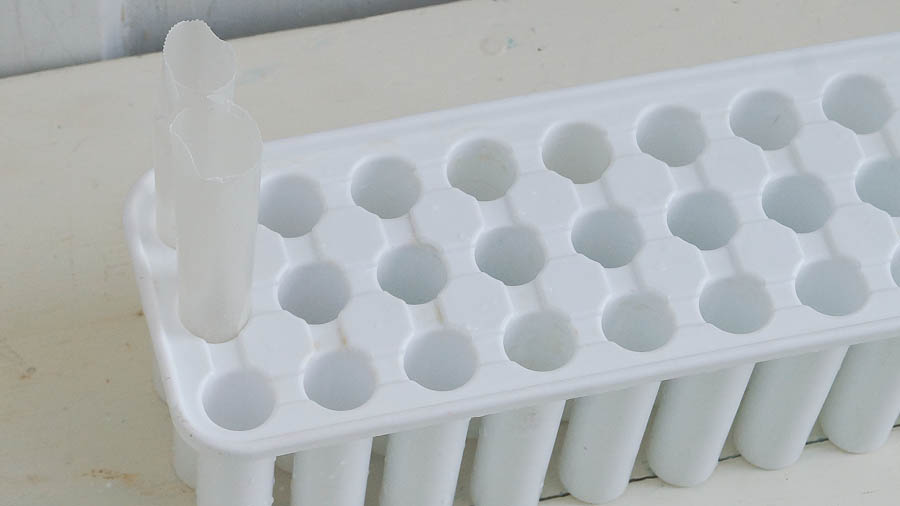
Nope!
You can see by looking at this photo again that those pieces of chalk that are left inside still have wax paper attached.
Fail #1!
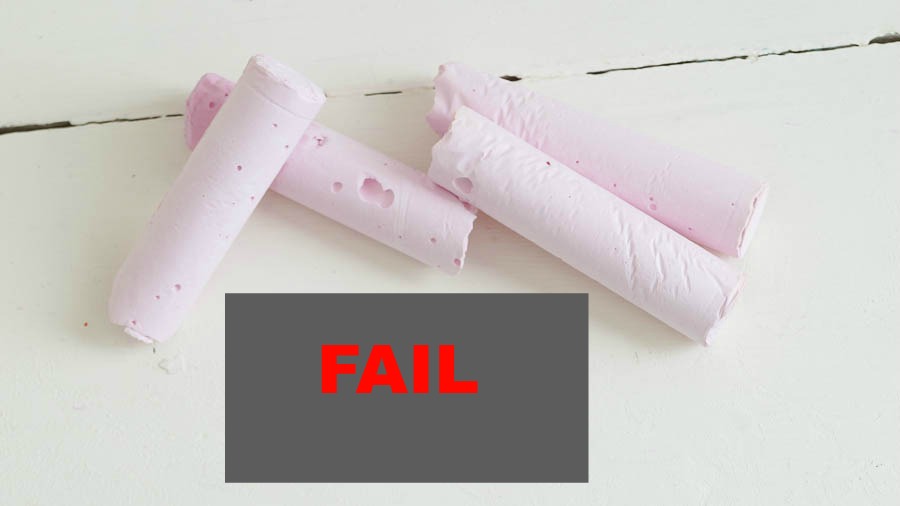
I am not giving up just yet, I am going to try and figure out how to use this mould to make chalk.
And when I do I will share it with you.
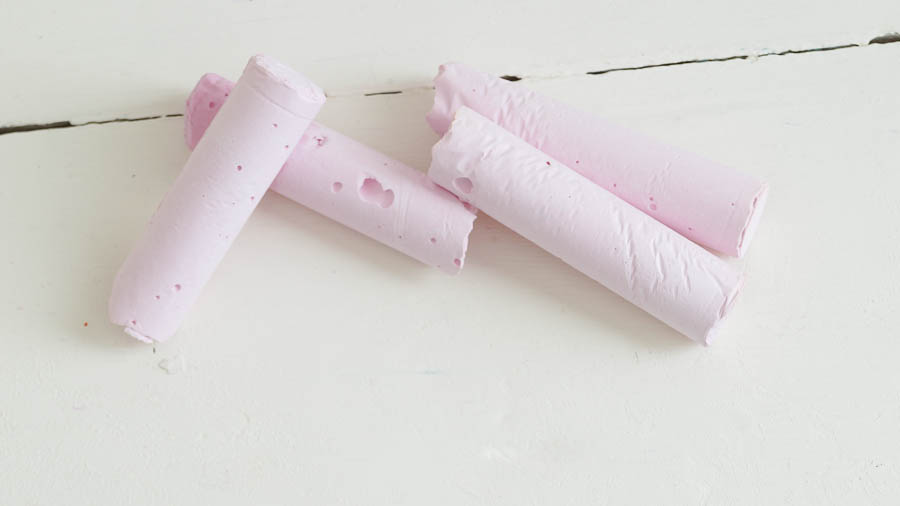
The good news is that this chalk works great!
Of course I would make pink chalk right 🙂
The only fail in with this project was the mould, the chalk works perfectly!
*************************
Next project fail was my attempt to dye fabric and use a stamp to decorate it.
I had my supplies.
– Rit dye liquid and powdered
– Linen napkins(from the craft store)
– Acrylic Fabric Paint
– Plastic bowl
– Wood paint stick
– Pencil
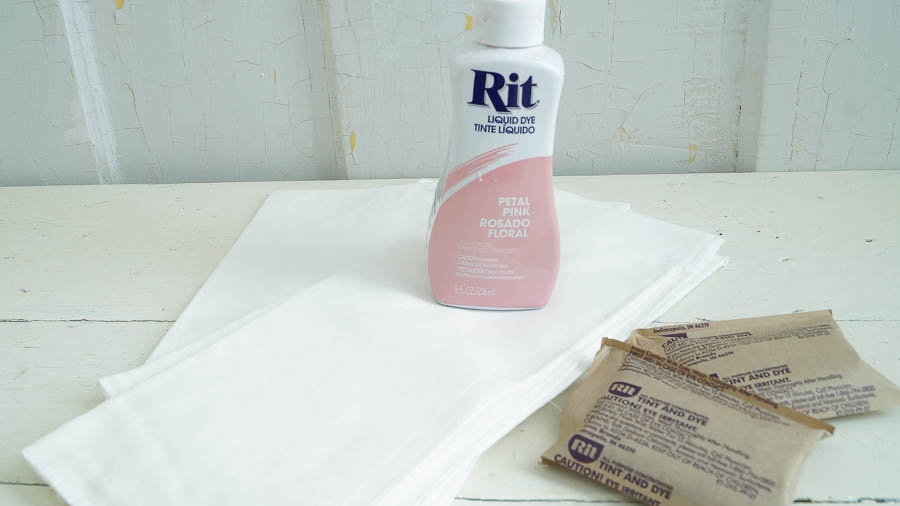
(The plastic bowl that I am using is from the thrift shop, and just used for crafts.)
So I decided to use some dye that I already had and I picked up the two packages from the craft store.
One of the powdered packages is purple the other grey.
I wanted a soft greyish purple.
I added the purple to my water, and immediately it turned a dark purple, so I added a little grey hoping for the best, along with a little pink.
Looking at this photo now it looks sort of scary!
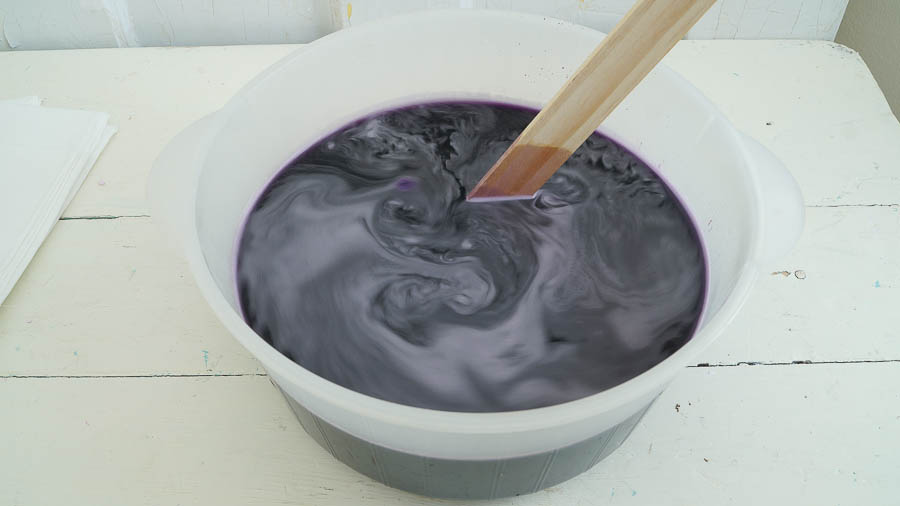
I know it’s a little dark but I went for it anyway.
As I looked at my fabric while it was sitting in this dye, I noticed that it was looking more like dark grape than a soft muted purple.
I ran into my laundry room to rinse it off.
Well, this dye grabbed pretty quickly, I ended up soaking it in bleach for an hour to lighten it up.
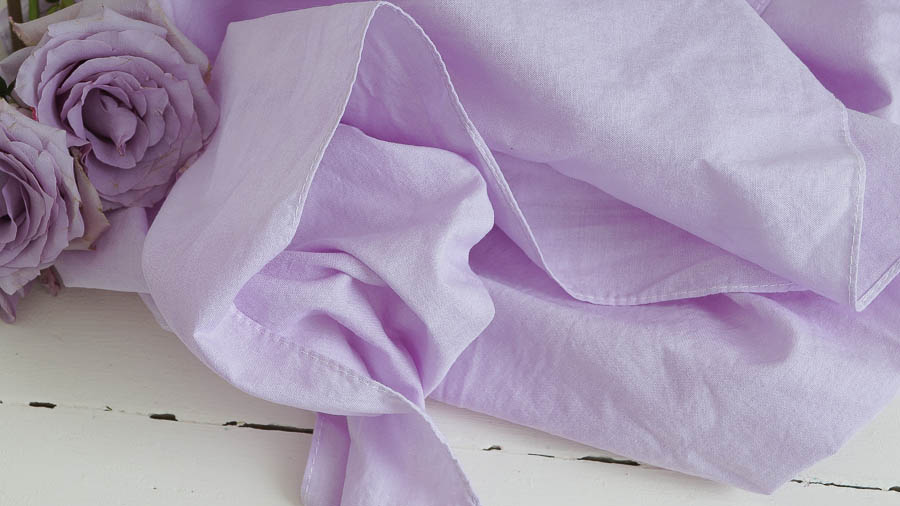
Much better!
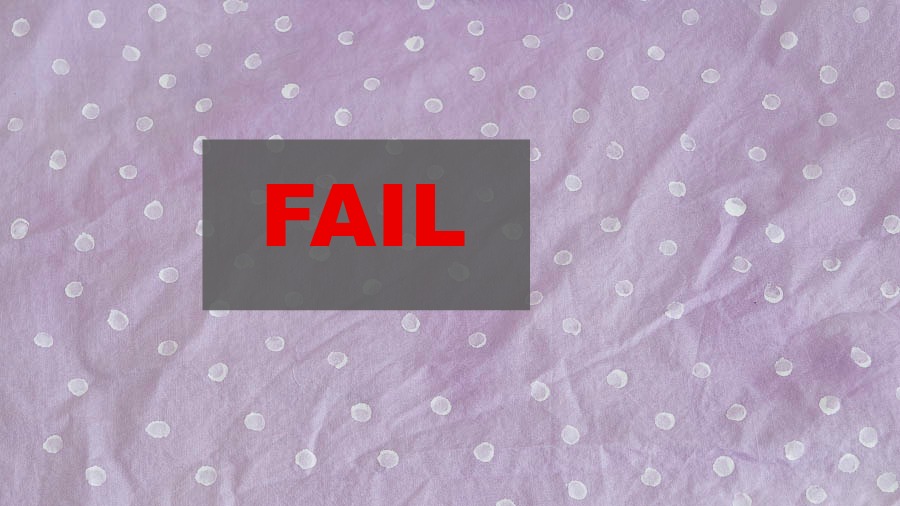
So let’s try a simple polka dot pattern.
I pulled out an acrylic paint that said it was for fabric and with the eraser on the back of a brand new pencil,that was dipped into the paint, I started stamping polka dots on my fabric.
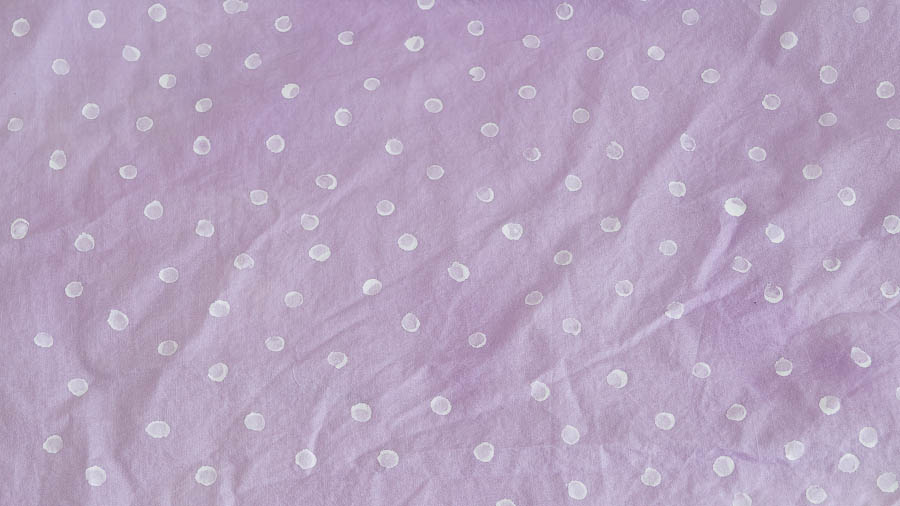
Not exactly the look I was going for at all.
And the polka dots feel very stiff.
Not what I expected from paint that is meant for fabric.
Fail #2!
I am working on designing a stamp and I am going to try dyeing napkins again.
This time I don’t want to use bleach!
I always have an idea in my mind of how something should turn out.
But it does not always turn out the way I would like.
As they say ….back to the old drawing board!

Glad to know someone else fails, too. I have more boo-boo’s than successes, sometimes even with a tutee or directions in hand!
As for mixing dye, or any paint colors for that matter, always start with your lightest or palest color. As you found out, starting with dark and adding light only gets you a lot more of the dye water than you want.
Even when I use fabric paint, I still add fabric medium to it to keep the dried paint soft. Not all brands of fabric paint dry soft without added medium.
Keep on experimenting, don’t give up. That’s half the fun of crafting–trying new things, sometimes succeeding, sometimes not, but always learning!
Yes and I should have known that Kathi.I am a hair stylist by trade.And was taught the darker color always dominates.Thank you, I a not a quitter, I will keep on trying and sharing when I succeed or fail 🙂
Nice attempts. I’m sure you have a lot more winners than losers. How about using cooking spray in the moulds? They should release then. Maybe.
Thank you Eileen, yes I was thinking of trying that.But I wasn’t sure if it would do something funky to the mixture.But hey what do I have to lose right 🙂
Oh Anne- so glad to know you are like the rest of us! I was also going to suggest the cooking spray for the chalk mold. And although you may not want to wear it,(because of the stiffness) I love the fabric! maybe you can use it for decorating? It looks very spring-y.
Oh, I made some faux porcelain flowers and I LOVE them! That was a huge success!!
Thanks Laura I am going to try cooking spray.Yay so glad you tried making those flowers.Isn’t it fun! Messy but fun!
Thanks for letting us see the “fails”. Now we all feel better about ourselves! When I made chalk in Vacation Bible School one year, we rubbed toilet paper rolls with vaseline before adding the chalk mixture. I don’t remember having any problem with it. But then again that was on a cardboard paper roll, not cute little chalk molds like you have.
Thanks Terri, hey none of us are perfect.I would never want anyone to think that I thought I was.Believe me I am no where near perfect :-). Thanks so much for the tip! Something else I can try.
Love this post! I hope in the future when you get this fabric dye thing figured out you will post an in depth tutorial on dyeing fabric. I absolutely love the color of your finished napkin! So beautiful…
Thank you Stephanie, yes I sure will.I just bought some lovely napkins today, hoping to start that project tomorrow.Wish me luck 🙂
Well at least now we know how hard you work to give us good ideas.Such a trooper and thanks for showing us the other side of your ideas and how they work out.
Thanks so much Marlene! Yes it can get a little crazy behind the scenes around her 😉
Frustration is the mother of invention, so I’m sure you’ll sort it out, but meanwhile Chroma artist paints (acrylic) can be used on fabric, you need to use a bottle of something like a medium (also Chroma) so it stays on the fabric.
Just go to your art supply shop & “ye shall find” good luck.
Thanks so much Philippa! Yes so true…Ha! I will look for that next time I am at the craft store.
Neither one of those look like fails. That pink chalk is adorable.
Thanks Katie 🙂
Great idea making your own chalk. Never thought about it but if we can make chalk paint, why not chalk? Those weren’t fails, they were experiments. That’s how many an inventor has figured out how to make things we most likely take for granted now, trial and errors, look at what you’ve learned (along with readers of your blog). Gold star for your excellent efforts. Should be proud of yourself, you’re the one trying these experiments, not us. Am duly impressed.
Making chalk would be a fun project to make with kids I would think. Perfect mold for chalk. Maybe I’ll be looking for one of those now. I like to make things with youngest grand daughter, she’s a pretty sharp little gal and has great ideas of her own, (she’s almost 15). Out of 6 grand kids she’s only one that likes crafting and other personal education pursuits. Have great rest of weekend Glad you shared your experiments.
Thanks so much JaneEllen.Yes I agree,that’s why I keep doing it.Trying different techniques to see what the results will be.I would never have discovered that vinegar can distress furniture if I was not messing around with painting and distressing.Have a great weekend too!