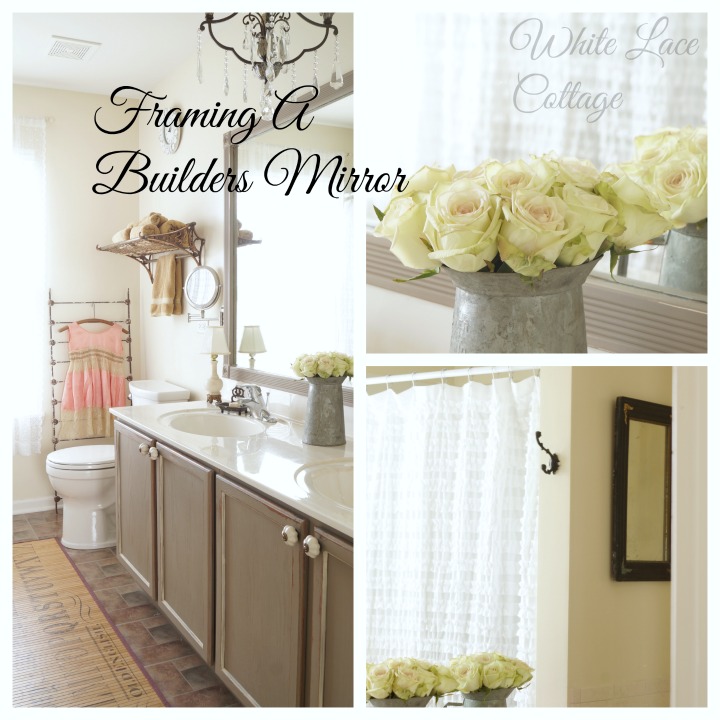
Sometimes I start a project and then months later I finally finish it and sometimes it takes a little longer to photograph it.I am sure you remember my master bathroom reveal I shared of my mini makeover.
All was finished except for the mirror,it took a little longer because it was back in February and we had bitter cold temperatures.
I was not ready to go out into the cold.
But I recently shared my daughters bathroom reveal,you can view it HERE.
When I did her bathroom I framed out her bathroom mirror,I mentioned that I as also going to do the same in my bathroom.
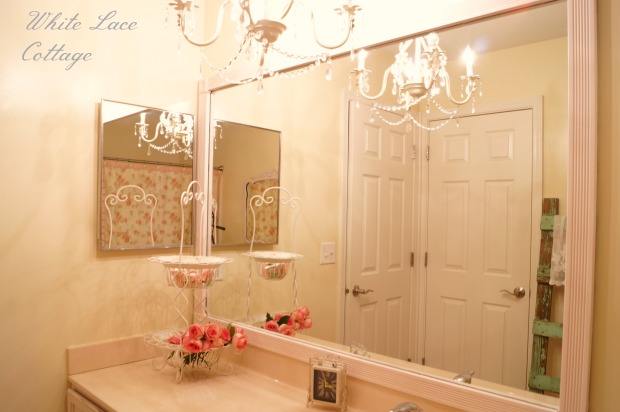
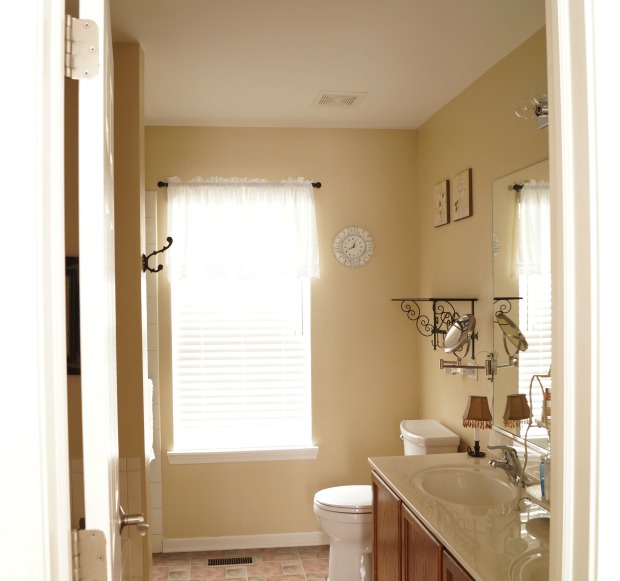
Here is the before shot of my bathroom mirror.
Pretty blah looking as one big boring mirror.
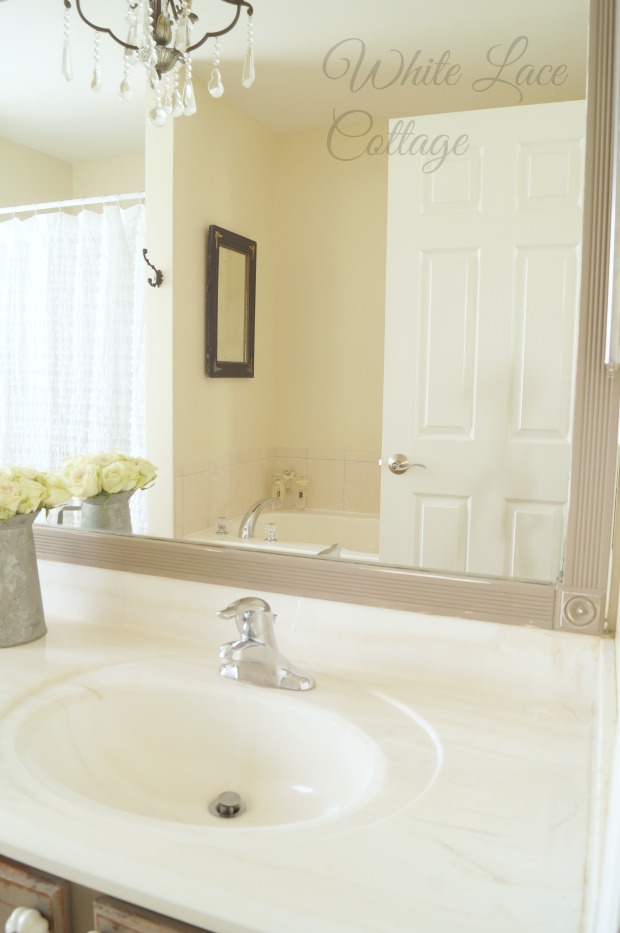
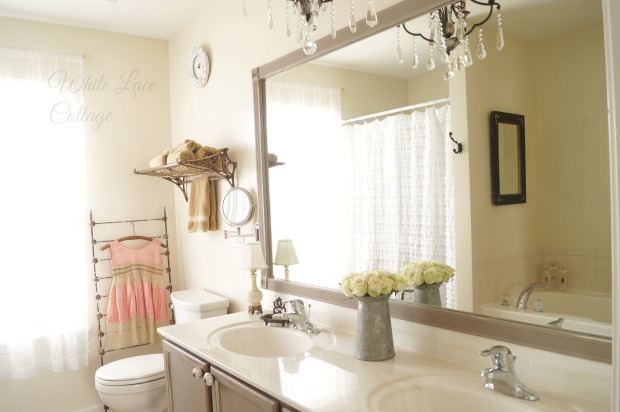
This is a photo of the mirror after framing it out.
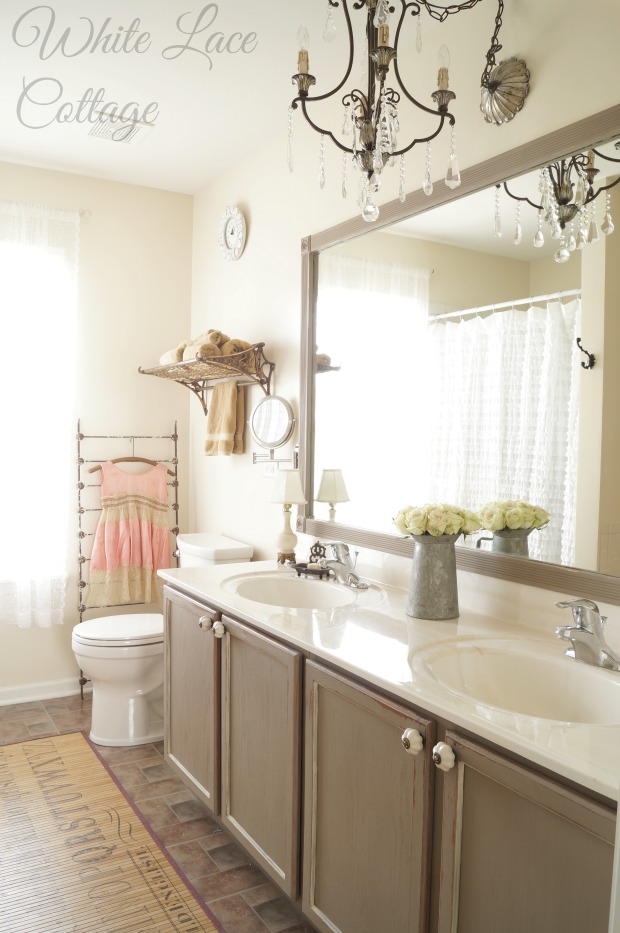
Quite a difference!
That very helpful Home Depot associate helped cut all the trim pieces for me so I did not have to do that.
As I explained on my post about my daughters bathroom , I just painted these pieces first then added a glue adhesive and applied the trim pieces to my mirror.
Now at first I was going to do a white mirror frame,but after I added it I decided that I should have painted the pieces to match my cabinets.
The cabinets were painted using Annie Sloan Coco,and that is what I used on my mirror frame.
Only one problem if you remember that I shared that you should paint the frame first then apply it to the mirror.
Why because you will see the reflection of the color in the mirror.
Well because I changed this after I hung it I had a white back and a coco color front.
So to make it a little shabby looking I sanded it just a bit so you could see some white peeking through which looks much nicer!
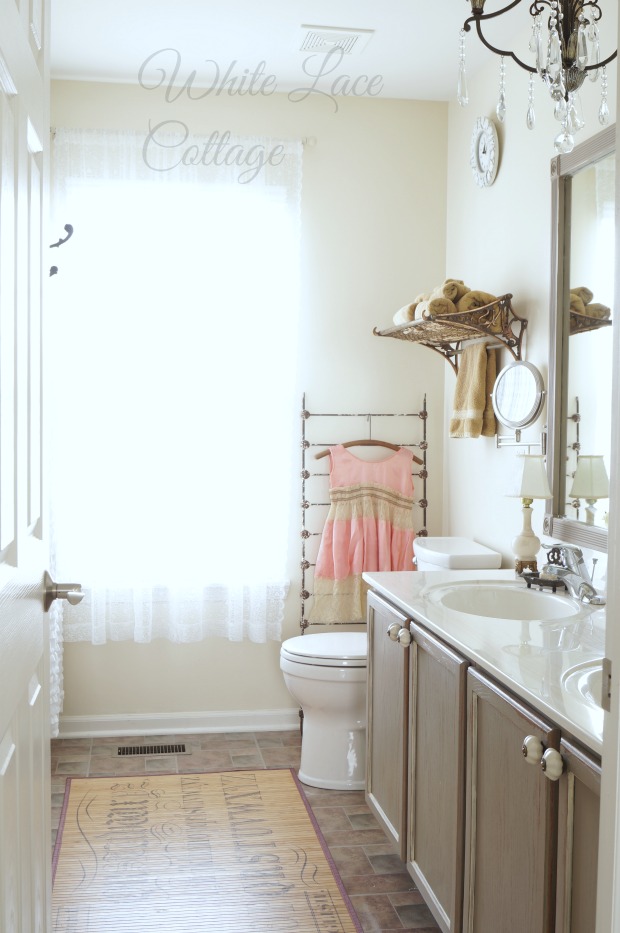
This makeover was so simple,just changing a light fixture,some paint and accessories,oh and a bit of trim too!
But it just shows you don’t need to knock out walls or anything to change a room.
I did not touch the floors,someday I would love to remodel this bathroom.
But it’s just not in our budget right now.
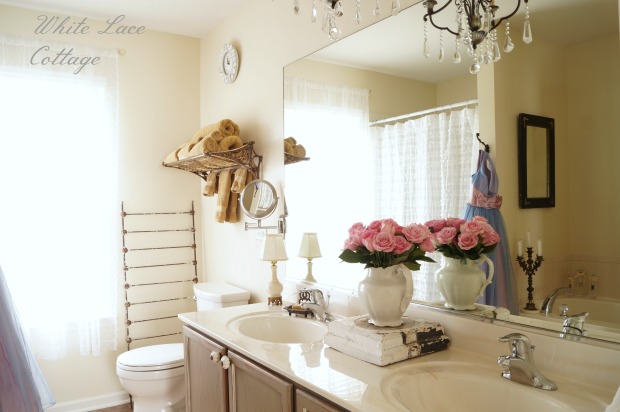
Here is a before shot of the bathroom.
And here is what it looks like now.
That bamboo mat is from Decor Steals.
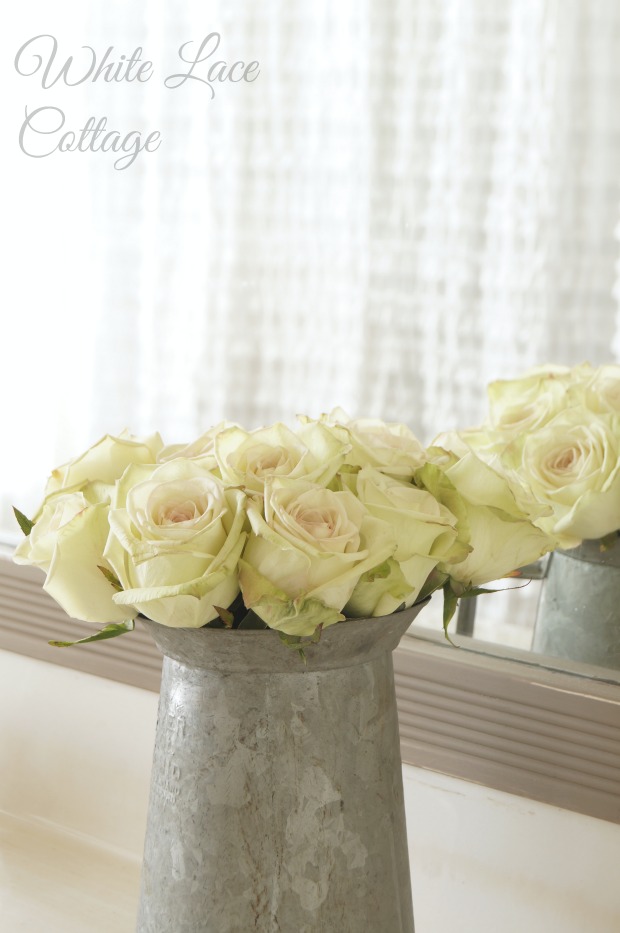
Fresh flowers are always pretty in a bathroom.
Just like I shared yesterday you don’t need a fancy vase.
This is an old zinc pitcher that I believe was used for oil,as in car oil.
I added just a touch of color to my vintage iron crib rail with that lace satin piece.
Not sure if it is an old baby dress or a top,but it has been altered a little and is very small.
But it adds just a touch of femininity to the bathroom without going overboard.

Joining:
So pretty Anne. Soft and romantic… Mine is slowly coming along. We tend to work at a few projects at a time, so we have 3 things going at once… Laundry room, sun room, master suite. 🙂
Soon!!
Enjoy your pretty master bath.
HUGS, Gee
Thanks so much Gee,yes take your time and do it the way you want it.
Beautiful!! Love a great budget makeover! Can you tell us exactly which adhesive you used to attach the trim to the mirror? I am thinking of doing the same in my bathrooms and I want to buy the right one. 🙂
Oh no Lisa,I am so sorry I forgot to mention it and I don’t have any left….but I will return to the store and find out which one I used and I will share it with you all 🙂
the framed mirror looks great–love the coco paint color, too! your pinks would go great with it:)
Thanks so much Lynn!
Your bathroom looks amazing. I love the mirror and the entire room looks so pretty and fresh.
Thank you so much Marty!
Super cute. I have the molding to do our guest bath but I have to cut the molding myself. I love the zinc pitcher.
Thank you Katie,I am so glad that I was able to get this cut.
Love the frame around your mirror, Anne! I have the same set up in our master bathroom. I’d love to frame our mirror out. I’m going to pin yours to show my hubby. I bought a frame for the main/guest bathroom mirror, but that was much smaller than ours. I can only imagine how expensive it would be for our big mirror. I’d rather just DIY a frame.
Thank you so much Kathy,this was so easy to do,just make sure to measure correctly and if you can’t cut it just take it to home depot.They will cut it for free!
It looks beautiful Anne!
Thank you Pamela!
I think you’ve done a great makeover on your bathroom! It’s very warm and inviting now. I think the framed mirror made a huge difference. The mirrors in my bathroom are unframed, but they fit in between two walls so they don’t really feel unfinished. I would love to remodel our bathroom one day too, but (like you) it’s not in the budget for a total makeover. You’ve given some great ideas for doing it on a budget though.
Thanks so much Kelly,Oh I have big dreams for that bathroom someday….. <3
Love this Anne. Great job love love the master bathroom make over and how you trimmed out the mirror. Just gorgeous and so so cleaver. Great way to make the big mirror have some personality and bling.
Kris
Thanks so much Kris!
Very pretty, Anne. I love the crib rail with the pretty pink vintage top hanging on it!
Thank you Vickie!
It looks like a whole new bathroom, Anne. Great job and so pretty..Happy Tuesday..Judy
Thanks so much Judy!
That looks nice, Anne. Seems everybody gets trim and lumber cut for them at HD, but we asked at ours and they said they don’t do that. Huh? Good thing we have saws to do the work ourselves.
That’s a bummer Kim that they don’t cut the wood at your HD.
The frame looks great Anne…your bathroom is so pretty!!
Thanks so much Martina!
This is so pretty. I hope to see you at My Dream Canvas 🙂
Thanks so much Anu!
Love the framed mirror, Anne. I really like the paint color you chose, and matching it with the cabinet looks great. Everything looks really lovely!
Jeanette
Thanks so much Jeanette!
It is beautiful! Did you change the wall colour also? What colour is it if you did?
Hi Mona thank you yes I did change the wall color.You can view the paint recipe HERE.
My mirrors are older and some have damaged areas along the bottom edge. I framed the powder room mirror, which was in fine shape except for the lower edge. I used trim moulding made of polyurethane because it is lightweight. Also, my mirror had mirror clips, which stuck out on the edge. I was able to notch out a bit of the polyurethane with my utility knife to allow the moulding to go over the clip. I lightly sanded the mirror edge and used Locite Power Grab interior construction adhesive to attach the trim moulding. I held the top pieice up with painters tape for 24 hours – it was the only piece that wanted to slip. Fortunately I have a power miter saw, and then used caulk to fix any imperfections in the cuts. Did this in March and it is still holding with no problems.
I bet it looks beautiful Jeanne and well worth the effort!
I meant to tell you how lovely yours looks! I may try the trim moulding you use for my next one.
Oh thank you Jeanne!
You did a beautiful job!…just love the gorgeous transformation!!!
Thanks so much Shirley!
The room turned out beautifully!! I am going to steal every idea you had. lol But I have a question about the chandelier. Does it give enough light to do your makeup? I am concerned about it casting shadows on my face. Thanks.
Thank you so much Angie, and yes I have lots of light with that chandelier.I actually feel like I have more light with it as opposed to the lights I had in there previously.